When I found out the gender of our third precious one was a girl, I knew I’d be all about making clothes. And a pair of ruffle pants is so very adorable, and so very easy to whip up in a nap time, that I’ve made loads of them. I started in the fall when our daughter was crawling and dresses got in the way of that endeavor, but now that she’s an accomplished walker, I’m still in love with them, so I’m whipping up more, this time in lighter-weight, happy-colored, cafe & capri lengths for spring!
Here’s how to make them fast without a proper pattern, just using another pair of pants for sizing…
First find a pair of pants that fits… or is close to fitting (if they’re too small, just cut your fabric a bit bigger, and if they’re too big, just cut your fabric a bit smaller–you get the idea… an elastic waistband covers over a multitude of sins).
My little gaffer’s 16 months, and I used 3/4 yd for the pants (and 1/4 yd for the ruffle). Fold your fabric in half putting the selvage edges together, then fold the selvage edges back far enough for one side of one pant leg plus seam allowance (below).
Place the exiting pants on top of the folded fabric, lining up the outside leg seam with the double folded edge of fabric (bottom of picture above). Leave enough room at the left side (top of existing pants) to fold over twice to make waistband (about 1.5 – 2″).
Depending on how long you want the pants, you can fold the existing pant up just a bit (like 3″ for a 3″ ruffle, below left) or more for a cafe or capri length finished pant (below right).
Then cut an outline around your existing pants, adding 1/4 – 1/2″ along the leg opening, inside leg seam, and crotch, then continue your cut straight up to add the extra length for the folded over waistband. You’ll end up with something like this (below).
Okay, you can put the existing pants aside–you’re done with those. If you open up the fabric pieces you’ve just cut, they’ll look like this: basically two rectangles with “J’s” cut out of them (below left). Fold each rectangle right sides together, lining up the J’s, then sew along the straight edge below the J’s (inside leg seam, below right).
Next turn one leg right side out (below left) and tuck it into the inside out one, lining up the seams & J’s (below right).
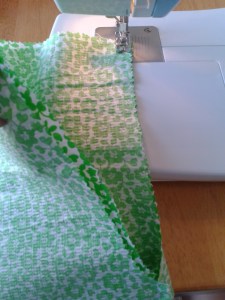
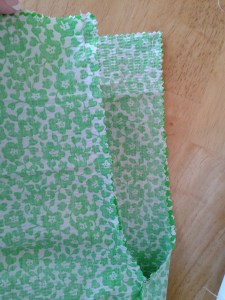
Sew around the double J (now a U, below left)–remember to backstitch at the start and end to lock your stitch–and you’ll end up here (below right).
Turn your pants right-side out, and you’re almost there!
Okay, now on to the ruffle. If you’re not a bit of a fabric addict like *I* tend to be, you may not have yards and yards of ruffled fabric just waiting around to be used, but there are plenty of tutorials out there on how to ruffle fabric. In fact, I was just going to add a link here to a good one, but none of them I found seems as simple as the way I do it, so I’m afraid instead of a link, for now there’s just a teaser: I’ll post the “how to make a ruffle tutorial” Monday. Yes, sorry, feel free to send your hatemail. If you want to know how I ruffle fabric..
…Click over here to see, then come back for the rest of the pants tutorial–don’t worry, you won’t lose your place: the link will open in another window. 😉 Meanwhile, if you do already know how to make a ruffle, make that of the same or coordinating or contrasting fabric and continue on…
Put the ruffle upside down right-sides together lined up with the leg opening of the pants.
Leaving about 1/4 to 1/2″ ruffle for seam allowance, start at the pants inside leg seam and sew around the leg opening, attaching the ruffle to the pants leg (below left). Do not overlap with your starting point. Sew all the way around and stop just short of where you started (below right).
And it will look like this (below).
Then sew the ruffle right sides together (below left), and trim if necessary (below right).
Then flip the ruffle down to “turn it” right side out, and you’ll have this (below).
Then, starting at the inside leg seam again, run a stitch around the pants leg opening, making sure that the edge of the ruffle fabric is folded up inside and caught under the stitch.
This stitch is both for a lovely finished look and to make sure the ruffle stays flipped down and doesn’t fold up (this is especially useful for shorter ruffles that might not be as heavy).
Okay, last stop: waist! First, get your elastic (below left). I prefer knit to woven, but either is fine. I use 3/4″ width. “Measure” your daughter’s waist by holding a length of it around her. Then overlap it onto itself about an inch-and-a-half and sew it to form a closed loop (below right). Then set that aside.
Your elastic loop will be smaller than your waistband at this point, of course (below). But don’t panic! 🙂
Fold over your waist hem once about 1/2″ and, starting at the back seam, sew all the way around. Then fold over the waist a second time, about an inch this time, tucking in the elastic loop, and sew around again (below).
When you start running out of elastic (below left), lock your fabric in place by lowering the needle, and gently pull the elastic through the tunnel you are sewing to have more elastic to continue on around the waist. This will cause the fabric to bunch behind the needle (below right), but no worries!
And there you have it! One fast, easy, stinkin’ cute pair of ruffle pants!
Wheeeeeee!
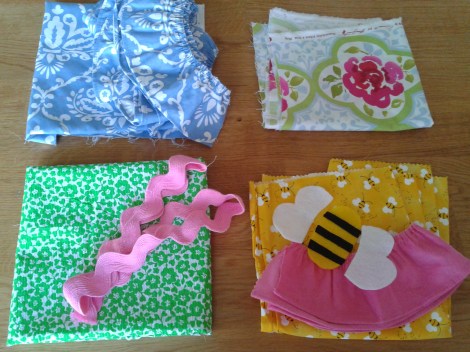
Oh my, and look what else is on the sewing table for [hopefully] next week: easy custom bumble bee felt applique and fabric lovelies in an array of spring-ready shades! Yippee! What’s coming down the pipe for your creativity this weekend?
*
You might also want to whip up these cute, easy-to-make clothes…


Pingback: From Child’s T-Shirt To A {stinkin’ cute} Toddler Dress | CampClem·
Pingback: Cutie Acorn Outfit {for the little miss} | CampClem·
I havent found a ruffle tutorial yet that has worked. Can you let us in on your secret :))
LikeLike
It’s done! It’s up! Ruffle to it!! 🙂 https://campclem.com/2012/11/02/the-lowdown-on-how-to-make-a-fabric-ruffle/
LikeLike
Another plea for an easy ruffle tute! I refuse to fork over $50 for a ruffler for my sewing machine! 🙂
LikeLike
It’s done! It’s up! Ruffle to it!! 🙂 https://campclem.com/2012/11/02/the-lowdown-on-how-to-make-a-fabric-ruffle/
LikeLike
GREAT! Thanks so much!
LikeLike
G–I googled ruffle pant tutorial on Google and you were the #2!! And I know you! So fun!
LikeLike
So fun! 🙂 Who is KLee?!?!
LikeLike
Just noticed you don’t use blogger and my pic didn’t show up. oops! 🙂 it’s Kendra from tx/sc.
LikeLike
Yay! Cool! That is too wild that it came up as #2?? Y’all get any snow down there yesterday?
LikeLike
No snow here. Just crazy cold wind. Thankful for some sunshine coming!
LikeLike
Pingback: {the lowdown on} How To Make A Fabric Ruffle | CampClem·
Pingback: Birthday Crown Tutorial {supremely simple & stinkin’ cute} | CampClem·
Pingback: The Five-Minute {rampantly ruffled} T-Shirt Tutorial | CampClem·
Pingback: The Liberating Limitation Of Fabric Scraps | CampClem·
Pingback: Aaaaaand Just A Few More Ruffles: Easy Christmas Shirt | CampClem·
I am needing to make a ruffle that will be 16″ long. How much fabric do I need to start out with to get 16″ ruffle??
LikeLike
I would cut about 32″ – 40″. YOU determine the length of the ruffle as you ruffle/bunch the fabric, but a 2 or 2.5 : 1 ratio gives a great finished ruffle. Once you’ve ruffled the fabric, you can measure it, then ruffle it a little more or less by pulling the thread or fabric to fit your desired finished length. Hope that helps!
g i n a
LikeLike
Hi do you have an layout on ruffle bloomers?
LikeLike
Pingback: A {total sweet spot} Week In The Life At CampClem | CampClem·
Pingback: Outfit Yer Li’l Buckaneer: Simple DIY Pirate Pants | CampClem·
Pingback: 3 New {totally cute} Simple-Sew Outfits For Sis | CampClem·
Pingback: Adding Fun Details To A Simple Tunic | CampClem·
Pingback: How To Make {little girl} Upcycled T-Shirt Ruffle Pants | CampClem·
Pingback: DIY Pumpkin & Polka Dots Outfit {for a little girl} | CampClem·
Pingback: The Easy Way To Make A Turkey Shirt {with a gobble, too!} | CampClem·
Pingback: My Old Shirt Goes “Holly Hobbie” For Sis | CampClem·
Pingback: I Bought A Dress And Cut It Up | CampClem·
Thank you so much for such an easy tutorial! I wasn’t able to make pants before I found this. Now I am making them, still trying to perfect, but I am getting there thanks to this!
LikeLike
Pingback: Easy DIY Shirt: Felt & Ribbon Christmas Tree | CampClem·
Pingback: Upcycled Again: Dress to Skirt to Pants & Straps | CampClem·
Pingback: Matilda Jane Giveaway WINNER! …and a birdie outfit makeover | CampClem·
Best yet!!! Thanks even I think I can do this!
LikeLike
Pingback: The Summer Shorts Sew-A-Thon {& upcycle-o-rama} | CampClem·
Pingback: Heather Bailey Creative Challenge & Giveaway: Project 2 | CampClem·
I think I love you!!! I am new to sewing and bought a pattern for ruffle pants. After a great gnashing of teeth and thinking “wirty dords” I decided to google it—-like a ray of sunshine, this blog post appeared. Hmmmm maybe this pattern would make some nice kindling for the fire……
LikeLike
You are not alone! Patterns are supposed to simplify things (and I’m sure they do for many), but they make me a little crazy. They’re so tedious! Welcome to the Camp! No teeth gnashing allowed, wheee! 🙂
LikeLike
Pingback: Pink Campy Peasant Top | CampClem·
I have had the hardest time when making these pants. Not the sewing part but with the fit. The rise in the crotch area is always funny looking or the rise in the back is too short. Any suggestions on getting those areas right?
LikeLike
what type of fabric did you use? I am always at a loss there!
LikeLike
I’ve been sewing for years but have avoided making clothing because store-bought patterns are so darn hard for me to understand. This tutorial is so easy to follow, and the pants turn out so cute, that I’ve made two pairs this week and am starting my third tomorrow. You’ve renewed my love for sewing! Thank you!
LikeLike
Lovely blog you have hhere
LikeLike