Maybe it’s from living in Texas for almost twenty years, but I just like some things big. And “everything’s bigger in Texas,” or so the saying goes.
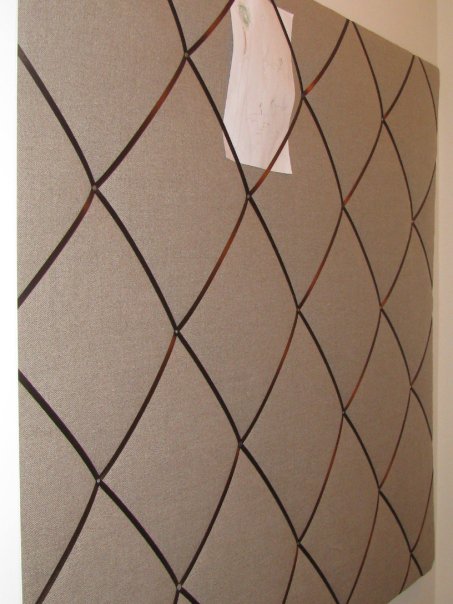
So as I set out to make a memo board to hang in our laundry room, I knew I wanted it to cover a large part of the small wall. At the time, I refused to have our fridge covered in papers and photos (alas, that has since changed), and I wanted a place to display school notes, photos, kids’ artwork, cards, etc.
I went to the hardware store plywood area and told an employee my request: I needed a sheet of something huge, lightweight, and cheap as chips. He led me to a stack of great 4′ x 8′ fiberboard sheets. One sheet was only about $12! I think 1/4″ plywood would probably also work quite well for the same price, and might not be as bulky. They cut it down for me for free (I used the 4′ x 8′ section and saved the 4′ x 3′ section for another project/another day), and I was off to the fabric store. That’s twenty square feet of display goodness, people.
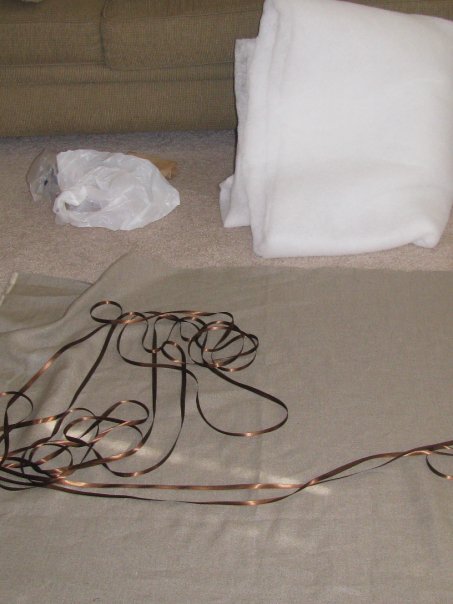
I scored a few yards of upholstery weight, linen-look, flax-colored material for $1/yard (!!!) out of a clearance bin. I only needed two yards, so I was doing quite well on budget there too! I also picked up some batting (2 yards of wide sheet batting), ribbon (narrow satin–how much you need will depend on the size of your memo board and grids), and a french cleat (just a few bucks at the hardware store, pictured later on in this post). Make sure you have enough fabric and batting length and width to cover the entire surface of your memo board and wrap around to attach at the back with staples.
And it almost couldn’t be simpler:
First, attach your french cleat (top half) centered close to the top of the fiberboard using screws and washers.
Next, lay the fabric face down on the floor and smooth it all out, then lay the sheet of batting right over it, also smooth. Then lay the piece of fiberboard centered on top (with the cleat facing up and the screw heads/washers facing down. Then staple it all the way around to attach your layers to your board. Staple first in the center of each of the four sides to make sure it’s taught and straight, then go from there filling in all the way around the perimeter of the back.
Take special car on the corners so they don’t bunch up, cutting off excess fabric & batting bulk if you need to.
Next, drawing on a bit of that handy-dandy high school math you swore you’d never use, figure out how far apart you want your ribbons. You can do the ribbon grid up & down, diagonally in diamonds (as I did), in varying widths, etc. Make a small mark at each point along the edge where the ribbon will wrap (this will be covered by the ribbon, so no worries about how it looks, just keep the marks small), then staple your ribbon to the back at each mark. Repeat until your board is criss-crossed to ribbony perfection.
Finally, my original plan was to use upholstery tacks to create the tufting… but they pulled right back out of the fiberboard (though I bet they’d be awesome in the 1/4″ plywood, if you go that route!)…
…so I scratched that nailheads and used short screws (just make sure they are not long enough to go all the way through your board).
The screws worked out great. and I do love a little subtle tufting.
Then, I attached the bottom half of the french cleat to the laundry room wall and hung that puppy!
This is the top half of the french cleat, attached to the back of the memo board. See how my fingers slip under there? That’s basically what the bottom half of the french cleat does. It’s almost a mirror image of this piece, which you screw to the wall stud. I probably should have used two of these or a wider one to spread the girth of this mammoth board… but I didn’t want to have to level two of them… and I’m a git-‘er-done budget conscious craft cheap-o… But since the board’s been hanging for around two or three years, I think we’re okay.
I asked my sweet eldest son to snap this crafty action pic as I made this project. That kid’s so awesome. I just love him to itty bitty pieces, and I’m so glad to have this massive memo board to display lots of photo and artwork of his and his siblings!
Here’s how the memo board looks today (another photo snapped by my eldest… thanks, Big Bro!), gloriously cluttered up with treasures, photos, and encouraging notes! [Another benefit of the french cleat is that you can simply and easily take the board off the wall and carry it to another, more comfortable space to sort through if it gets too full and cluttered… Um, ahem… not that *I* would ever need to do that, haha. I’m speaking strictly theoretically, of course.]
I think one of these would be fantastic on a child’s room with bright, fun, patterned fabric and multi-colored ribbons…
Or excellent for a teenager so he or she doesn’t put a bunch of poster tacks in his or her wall…
Or glorious for a playroom with a different section for each child’s artwork…
Or (dare I dream??) in a craft or sewing room to have current projects or ideas right there to marinate!? Wheeeeeeeee!
So, how would you use a gargantuan french memo board (and are you going to dash out and fetch the supplies to make one right this very moment??)?
*
You might also like these posts…


Oh my gosh! That is THE cutest thing ever!
LikeLike
Pingback: Six DIY Easy, Cheap {& fantastic!} Boy Costumes | CampClem·
This will be perfect in my little girl’s room! Thanks for the how-to!!!
LikeLike
I’d love to see how it turns out! Share a photo on the CampClem facebook page, pretty please?! 😉
LikeLike
I love your huge memo board. I’ll be making my first memo board within this week (hopefully) ^^*
LikeLike
So fun! Please share a pic of it when you’re done over on facebook! I’d love to see how it turns out! http://www.facebook.com/campclem
LikeLike
Pingback: how to: jumbo magnetic framed chalkboard {on the cheap} | CampClem·
How much ribbon did you use?
LikeLike
What is the thickness of the batting used?
LikeLike
if you would have used 1/4 ply as a backer bored it would have made it a bit stiffer with the fiber board on top and a stiffer point to staple fabric to..
LikeLike
Hi i am planning on making one of these for my daughters room and possible mine also.
Does the fabric no ladder from the screws used to attach the ribbon thanks
LikeLike