
Okay, so to be fair, our front porch still has its fall decorations (remember the polka dot pots?). Yes, I am a slacker. I feel a little like the entire month of November has been a bit of a wash since there seems to have been at least one or two of us sick at any given time.
However, in the spirit of the season… And since time is running thin… And since I’m positively ITCHING to get my front porch fully decorated… And since I wasn’t a blogger yet this time last year (so you haven’t seen this yet!), I’ll share last year’s porch with you…

The first thing I did was run out to my local mom & pop hardware store and pick up a couple of tomato cages. They were about $2 each, and they come in a bevy of sizes. I might get bigger ones this year! You can barely see them there sticking out of the planer pots (you know, the pots I later painted black).

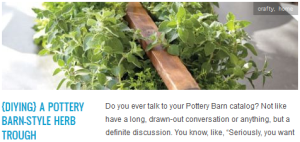
I filled the planter bottoms with rocks to weight them down, then wrapped garland around the tomato cages (I used one 8′ length fake garland for each planter “tree.” Then I added lights. For the Pottery Barn style herb trough, I did a quick stencil of “Merry Christmas” with acrylic craft paint.

You can read here how we made the herb trough out of a pallet. I extended the “T” to be a cross, but otherwise these are just stenciled from a cheap pack of cardboard stencils I have on hand for just such an occasion! I tied scraps along the handle. And later–although I’m afraid it’s not pictured–I took clippings from out juniper bushes and tucked those into the trough, which I thought looked just perfect… Wish I had a photo, doh!

The wreath on the front door was made using a simple wooden wreath form (about $3 from Michael’s) and fabric scraps. You can find that tutorial here to make your very own! Very simple, inexpensive, and gratifying! I found a little string of battery operated LED lights that I also added to this wreath, so it lights up at night with a lovely glow.

The tomato cage “trees” still needed a little something, so I cut out and layered a couple of felt stars for toppers (quickly sewn around the perimeter and left open at the bottom). And there you have it!
…Or, at least, there you had it… Oi.

This year, I might add this pennant bunting I made last year across the front door transom window…
OR… Maybe I’ll paint the fall-colored pots red, green, and white…
OR… I scored a fantastic box of pastel-colored vintage glass ball ornaments at the end of February in Goodwill, so maybe I’ll change the porch look altogether this year!
Wherever the porch decorating lands, you can be sure it will be blogged here at CampClem!
And speaking of “here at CampClem,” I must take a moment, dear friends, to say a humble thanks to you. As I am ensconced in this season of deep gratitude and celebration, I am struck by the wonderful blessing that meeting you here has been. I deeply appreciate you taking the time to drop in and really love to read your comments and feedback. I think you’re swell. Thanks for dropping in!
*
You might like these other posts…


I love love love your idea for using the tomato cages and garland!!! Every year we buy new trees which look beautiful for about hmm… a minute. I will never have to buy and kill evergreen trees ever again!!! Brilliant idea!! Can’t wait to see your ideas for this years porch decor! 😉
LikeLike
Alicia, thank you so much for your kind comment and generous praise. I cannot take credit for the tomato cages… I saw someone else do it somewhere along the way and also thought it was brilliant! [And even better: no maintenance and CHEAP!]
LikeLike
Pingback: This Year’s Christmas Porch {it’s a work in progress} | CampClem·
What beautiful, unique ideas!
LikeLike
Pingback: Simple DIY Christmas Bunting | CampClem·