
If you do not know who Heather Bailey is, please take just a moment to go familiarize or remind yourself.

She is a fabric designer whose prints you have probably seen out and about. She creates whimsical, modern yet vintage, glorious fabric collections. And I have a big crush on her work.
So when I contacted her company early this spring, I was absolutely delighted and humbled when she herself replied! Wheeeeee! I was thrilled to make a new friend, especially one whose work I respect and admire so deeply!

We chatted back and forth, and then Heather issued me a challenge. A CRAFT CHALLENGE!! And you KNOW how much I love a creative challenge!! GAH!
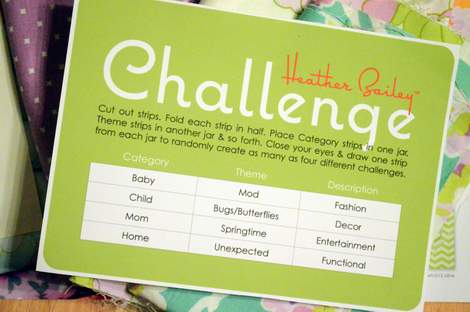
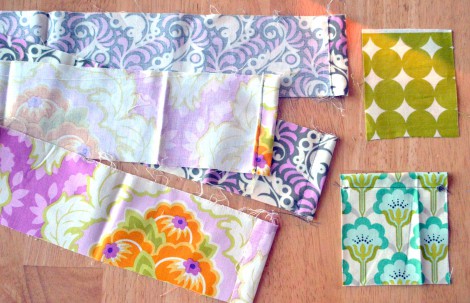
On my doorstep arrived a parcel of fabric, small pieces and scraps, and the above challenge.
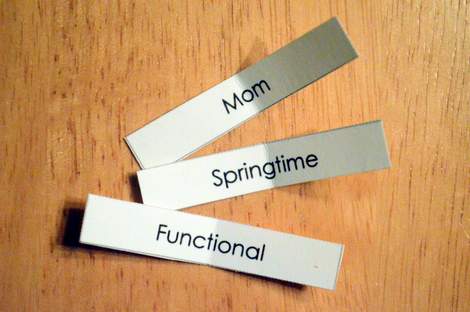
The task is to choose one paper from each of three categories and create something that answers that challenge. Today I’m sharing the results of “mom.” “functional,” and “spring.” Most of the fabrics in the Lottie Da collection scream “springtime” to me, so I focused on “mom” and “functional.” My brainstorming included making some sort of car holder for my cell phone, to get it out of a cupholder, or a cute tote…
The glory of Heather Bailey fabrics and the thrill of working within the limitation of smaller pieces is that you can piece patterns together in the most delicious ways.
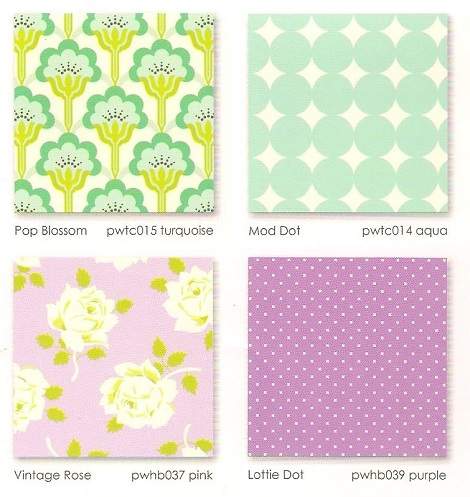 It’s actually a good thing that I have this parameter because I would probably become absolutely paralyzed by the possible combos with her Lottie Da collection alone.
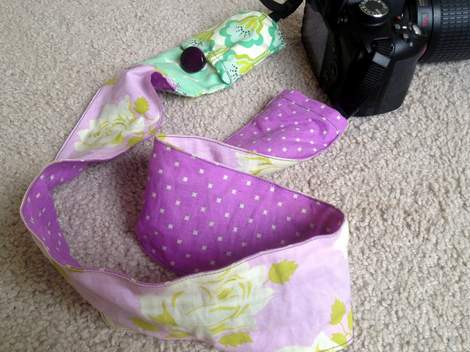
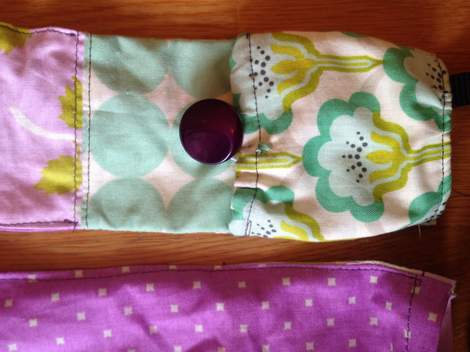
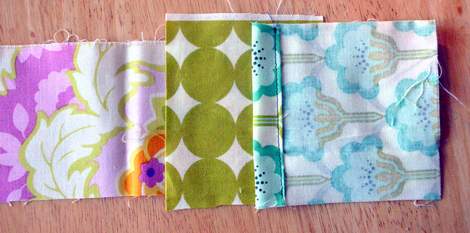
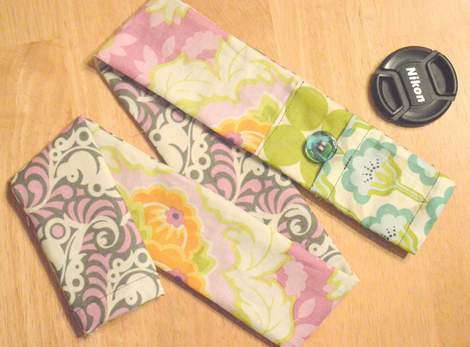
Thankfully, my friend Lois had asked about my camera strap, so I told her she could have mine. Of course, I needed a new one! And what better fabric to use for this functional piece that Heather’s?!
Y’all, I have taken like 10,000+ photos since I got my camera in February. It’s a little sick. …But in a good way. And a camera strap that equals the joy I derive from capturing our family’s moments is a glorious bonus!

I made this strap super simply using one long strip for the back, one for the front, and two small strips for the pocket and accent piece. The only other supplies besides my sewing machine were a button and a bit of elastic.
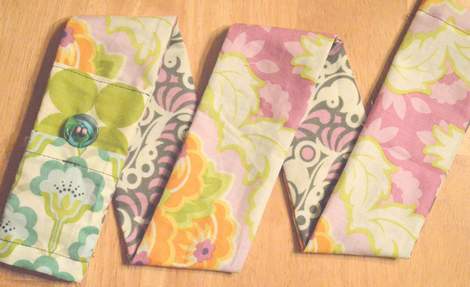
So I made another one, for you!!
Here’s how I made it, in case you want to sew your own. [I have shared a camera strap tute before, but this one’s even simpler!]
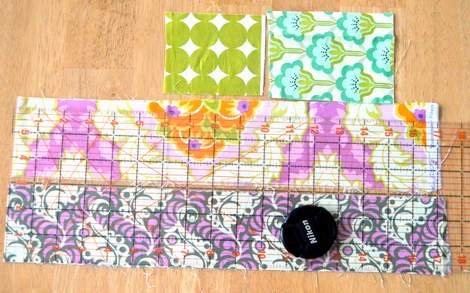
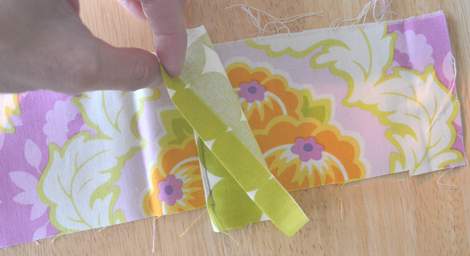
First, grab two complimentary (or contrasting) strips of fabric, each about 3″ x 34″, and two smaller scraps, one about 3″ x 4″ (contrast at pocket opening), and one about 3″ x 5″ (pocket).
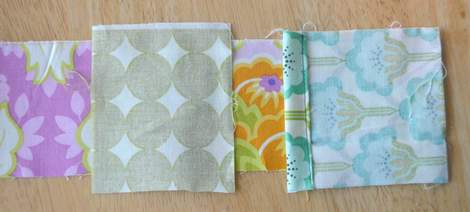
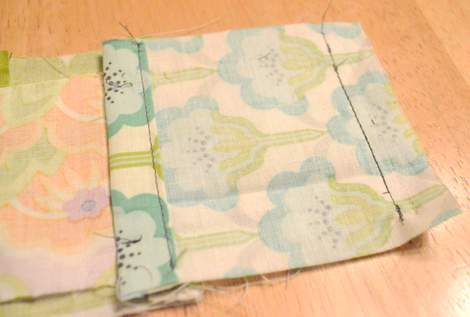
Hem each end of the liner/backing piece, one end of the cover/top piece, and the open end of the pocket.
So one end of the pocket, one end of the strap top, and both ends of the accent piece are not hemmed.
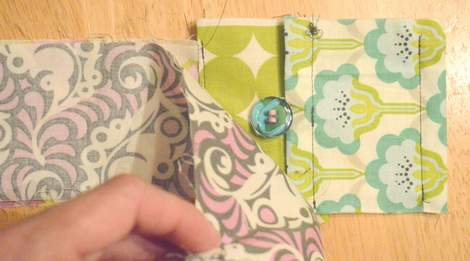
Now, you can skip the accent fabric altogether if you want (the green polka dot fabric, above), but if you do add it, line up the raw ends of the pocket and strap, so you can place your accent fabric so it will peek out of your finished pocket.
Once you decide where you want the accent fabric, flip it up, leaving a seam allowance, and sew it right-sides-together to the strap.
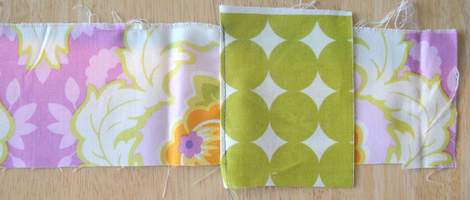
Then flip it back down and top sew it.
For the other end of the accent fabric, turn it under…
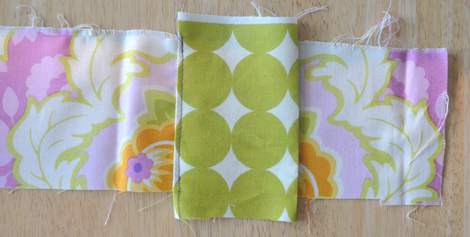
…then top sew it on to attach.
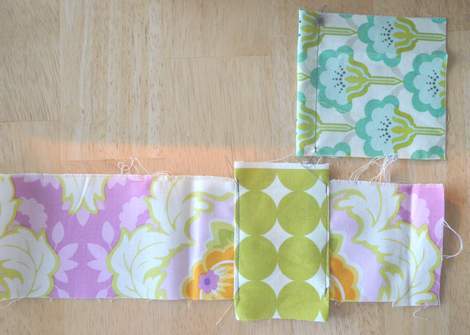
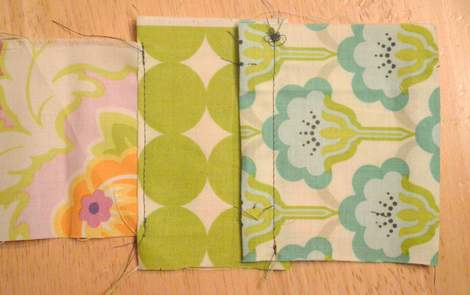
[So now you can see where the pocket will line up.]
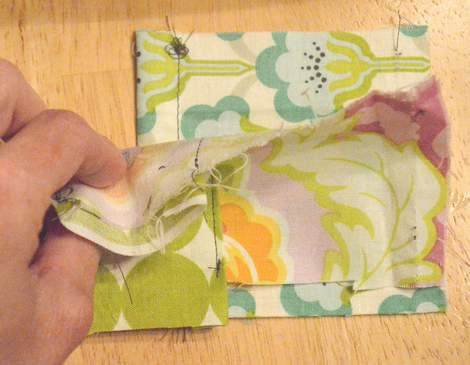
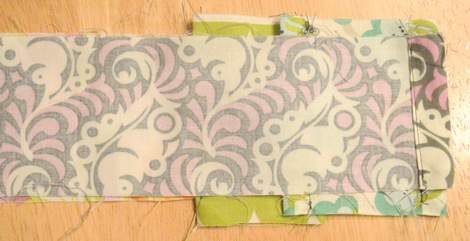
Okay, now this part is going to feel wrong, but place the pocket right-side-up under the right-side-up strap. Sew straight across the raw edge at the bottom of the pocket lined up with the end of the strap piece (right side in above photo).
[So it will look like this from the back.]
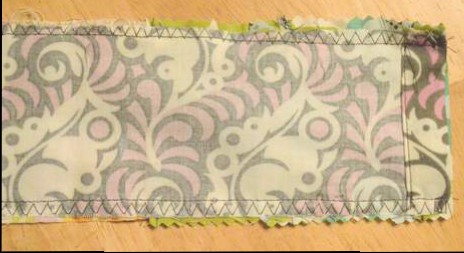
The flip the pocket flap around to the front.

Before finishing the strap, add a little loop of elastic to the inside top of the pocket.
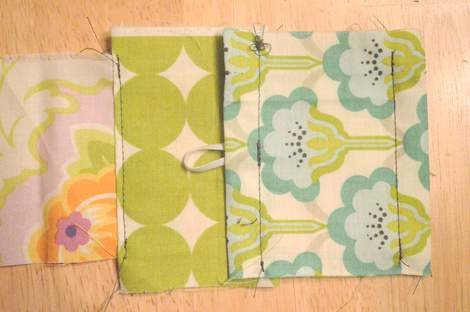
And top stitch the bottom of the pocket. [I did mine about a halk inch from the edge so it would match the hems on the other three strap piece ends.
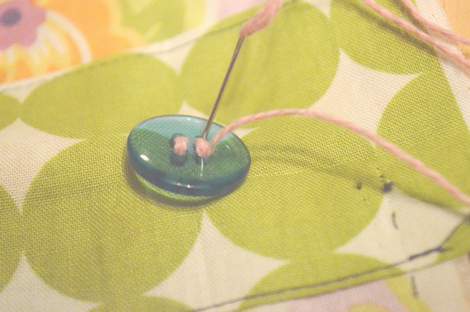
Add a button for the elastic to loop over.

Now this little pocket is ready to hold your lens cap when your camera is in use!
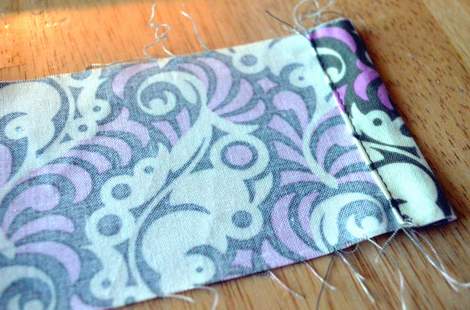
Finally, with that strap piece facing up, place the liner strap piece on top of it, face down, so the two pieces are right-sides-together.
Be sure to line up the hemmed ends.
Then join the two pieces by sewing up each long side (leaving the hemmed ends open). I used a straight/zig-zag stitch combo (you could do this in two passes if you do not have such a stitch on your machine. If necessary, trim excess fabric with pinking shears.
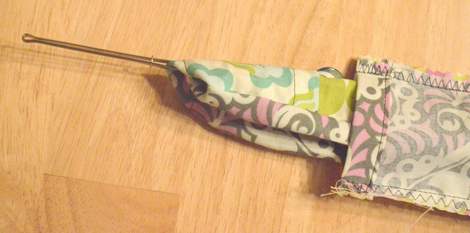
Finally, turn the strap right-side-out. I used my bodkin, a lifesaver in tight spaces!
Easy peasy!

And I’m giving THIS one away!

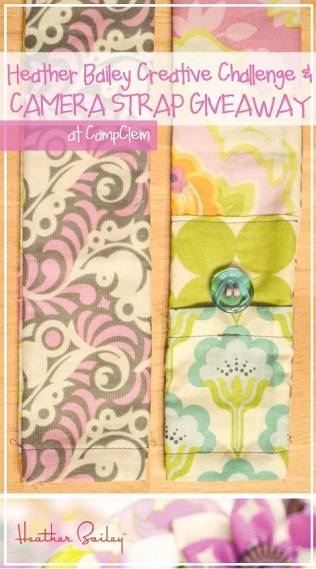
How would you like to win this CampClem-Heather Bailey camera strap? You can! This week, I am running a sweet Heather Bailey giveaway.
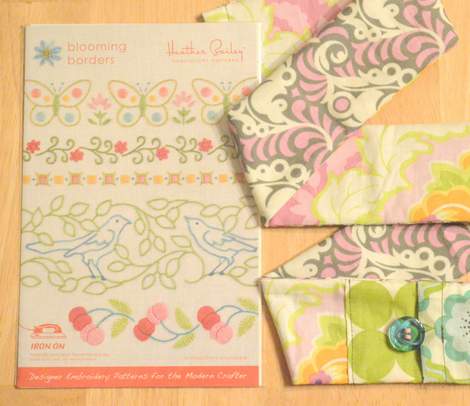
Today’s prize contribution is the camera strap AND this Heather Bailey embroidery pattern. [Retail is $35, and I’ll be adding MORE to the giveaway on Wednesday and Friday, so enter early and often!]
CLICK HERE TO ENTER:
 Y’all!!! You can enter everyday between now and Sunday, September7th, 2014, at midnight eastern standard time. [Click here or photo above.] Winner will be announced Monday, September 8th, wheeeeee!

[Come back Wednesday to see another Heather Bailey project …AND see what else is added to the prize package …AAAAAAND enter again and again to WIN!]
So I’m curious, what would you create if you drew the “mom”-“spring”-“functional” challenge combo? Do tell!
*Disclosure: This is not a paid post. The fabric, challenge, and embroidery pattern in this post were graciously supplied by Heather Bailey. All projects ideas, opinions, and general gushing over the loveliness of Heather and her fabric are completely my own.


Pingback: Heather Bailey Creative Challenge & Giveaway: Project 2 | CampClem·
Pingback: Project 3 {heather bailey creative challenge & giveaway} | CampClem·
Very cute project!
Sarah x
LikeLike