
So hopefully on Wednesday you caught the little tie shirt I made for my friend’s son’s train-themed birthday celebration he has coming up.

But I simply could not leave his little sister out of the fun!

Especially since she is my daughter’s bestie!!

Yes, some themed party clothing coordination was in order.So I made her a little ruffled skirt out of the same fabric used for his railway tie shirt.
Wanna make a cutie-pie skirt like this one?! Here’s how you do it:

For the skirt, you will need two pieces of fabric for the skirt and one piece for the liner, as well as a length of elastic long enough to go around your daughter’s waist. For waist and length measurements, I measured the little girl for whom I made this, but if you are sewing for a gift, you can use this handy chart to find out your appropriate sizes and lengths. [For my skirt, about an 18 month size, I cut a piece of 6″ long x 26″ wide and a piece of 5.5″ long x 44″ wide train fabric to end up with a finished skirt that is about 7.5″ long. The blue very lightweight liner fabric is about 8″ long x 60″ wide. My elastic is about 18″ long x 3/4″ wide.]
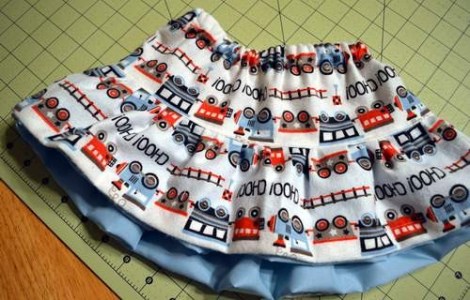
[It might serve some to mention at this point, ahem, that if you are using directional fabric (as in the trains are right-way-up or upside-down), to consider that direction as you begin to sew. My trains alternated right-side-up and upside-down… But alas! The “Choo! Choo!” row of wording that is showing on both the top half and bottom half of the skirt are both upside-down. WUPS! I guess the little girl will be able to look down and read the words perfectly well, right?? *sigh*]

Once your pieces are cut, sew each of the train fabric ends (henceforth referred to as “feature fabric”) right sides together to form two closed loops or tubes. Hem the bottom of the larger loop and the top of the smaller loop, leaving an opening on the latter to add the elastic later. Make sure your top hem leaves enough of a channel to thread your elastic through, so if you are using 3/4″ elastic, your channel will need to be at least that wide.
Then pin the center of each side of the larger piece to the center of each side of the small, raw edge to raw edge, right sides together. Then pin the halfway point again on each side, so you will end up with four equally spaced pins around the perimeter of where your two pieces will be joined (above photo).

Sew the two pieces together along the raw edges, scrunching the longer piece of fabric as you go to form instant ruffles. [The pins allow you to know how much fabric you have to ruffle in each section.]

You could just thread the elastic through now and finish the waistband to call it a day, but WAIT! There are ruffles to be had! 🙂
This skirt really does not need a liner, but since my friend bought this liner fabric when she got the train fabric, I seized the opportunity to utilize it.

It is a super lightweight poly fabric. I forget what it is called, chiffon, maybe? Used in lots of whispy formal gown overlays and designs… and it is Im.Poss.Ih.Bull. [for me] to work with. [I’m just not that caliber of a seamstress…]
BUT, you know my motto: get tangled up, just tango on! So I decided to make a peek-a-boo ruffled tulip hem. YES! Perfect! That way all my sewing indiscretions would be hidden away. 🙂

first, I folded the piece of fabric in half, so it was about 4″ long (still x 60″ wide), and zig-zag stitched along the raw top edge both to join the sides and also to prevent fraying.

then, just as the feature fabric skirt piece was wider than the feature fabric waist piece, the liner piece was much wider than the skirt piece.

I pinned the center points of each side, then halved and pinned again, pinning the raw edge of the tulip liner to the raw edge of the bottom of the skirt (where it joined the top of the skirt; I just folded the top of the skirt into the skirt to keep it out of the way).

Then I sewed the liner fabric to the inside of the feature fabric bottom skirt piece, scrunching to ruffle as I went. [Sorry this photo is flipped upside-down from the last one.]

So once the skirt is turned right side out, you have a lovely little peek-a-boo of ruffled tulip hem peeking out.
To finish the skirt, add a row of stitches around the bottom edge of the top of the skirt, where the two feature fabric pieces meet. [This is by no means necessary, but adds a nice detail.]

Finally, thread the elastic through the opening you left in the top seam using a bodkin (or a safety pin), sew the ends of the elastic together, and sew the skirt hem closed.

And there you have it! One positively party-ready train skirt!

She will be the perfect train birthday party guest at her big brother’s celebration!
GAH! So, sewing, giving a good gift to a friend, AND a theme?! Oh my, I’m in a trifecta of joy, y’all!! Wheeeee! 🙂

