
So, I’ve been serving at my church’s VBS for seven years now, and each year we get VBS shirts. They are an easy and cheap ($5!) uniform for the week… Just throw in the wash each night. But after VBS, I never wear my shirt again, so they end up tucked away (’cause I hate to part with them!).

Last year, I made my t-shirt into a tank using this tutorial, but this year I thought about stepping it up a notch by making a dolman sleeved, banded waist top out of a big shirt. I got the largest size they sold: a 3XL.

But the days wore on and I just wasn’t feeling inspired by that idea. I thought about maybe doing a lace inlay in the back panel.. But meh. [Recognize the lace? It’s that curtain panel I ended up cutting apart to make my double ruffle hem slip dress extender!]

I’d been making (or helping friends make) dresses and tanks left and right from this year’s VBS t-shirts, so maybe I wanted something a bit more unexpected. Whatever it was, this creative was waiting for inspiration to strike.

Finally, last night–the night before VBS began–I decided to just go for it!

I’d been mulling over a dress idea, and the more I gained a “what do I have to lose?” attitude, the more free I felt to cut! I grabbed last year’s tee-turned-tank and cut off the top to use as the neck of my new dress. [My thought was to incorporate several year’s VBS tees into one piece.]

I cut up several t-shirts into 6″ wide strips ( a feat made fast using my cutting mat, quilting ruler, and rotary cutter)… [And seriously, I should get commission for how much I tell you about them! But I lurve them!]

So I had several 6″ wide strips of varying lengths. Some of the logos I cut in half so they could appear in two spots on the dress.
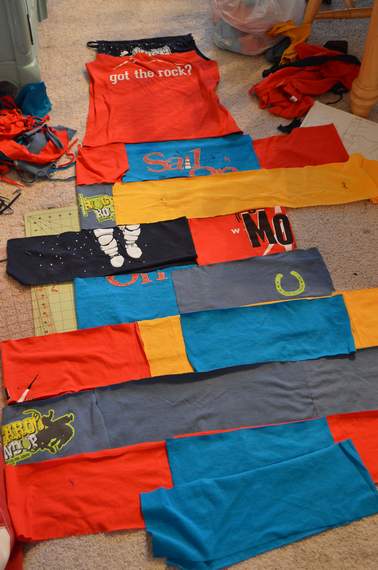
Then I started laying them out like a puzzle to get a feel for where I wanted what color blocks.
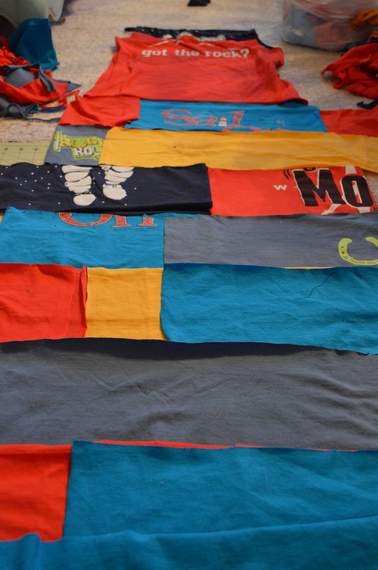
This is the “I hope this idea is the good kind of crazy” moment.

If you don’t have the neck already done from an old upcycled tank just lying around (haha), you can follow the tute here, but basically, you cut off the sleeves and top of a shirt, then fold the front and back under and straight stitch across, forming a channel on the front and back through which your strap can pass.

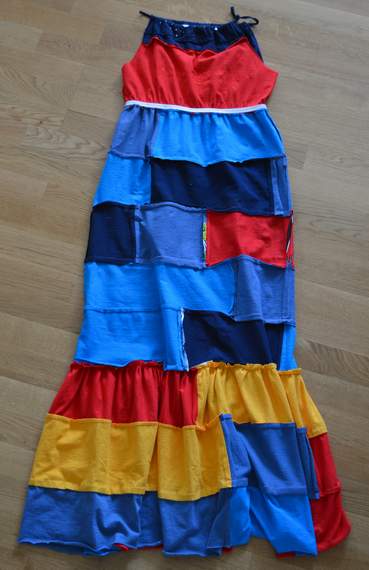
I just sewed the fabric into long strips and then tubes (by sewing together the ends of each long strip) to make several tubes of fabric. Next I sewed each tube to the bottom of the dress, right sides together, one after another to lengthen the dress. [Since my top shirt section fit over my hips, I did not widen the skirt pieces, but if your body widens more through your hips and thighs, adjust your tube width to fit your body.]

I tried it on several times as I worked to check the fit. I could have probably left it as this knee-length dress, but I wanted to be able to sit on the floor and get up easily without fear of flashing any unsuspecting passers-by! 🙂

I made the bottom three tubes twice as wide as the rest so I could make them into a ruffle at the bottom of my dress. Sew those three tubes together, then ruffle them before sewing them onto the dress (or do as I’ve started to do, and just pin the bigger tube spaced along the bottom of dress, right sides together, and finger-ruffle “scrunch” as you go, like I did with the lace hem slip).
I decided my dress was too long, so I cut it off halfway down the bodice and sewed the skirt back on a few inches higher, so mine went from drop waist to high waist.

Finally, I “measured” a length of elastic by holding it around my waist, then sewed it straight to the inside of my dress bodice at the waist, stretching the elastic as I attached it. Be sure to use a zig-zag stitch for this so that the elastic will still stretch.

I just overlapped my elastic at the end and back-stitched to secure.
I left the hem raw because–yay!–jersey does not fray.
So here’s what it looks like inside out…

And here’s me taking a mirror selfie once I got it done last night. 🙂

I might have gotten a little carried away.

But you know how much I love a theme!
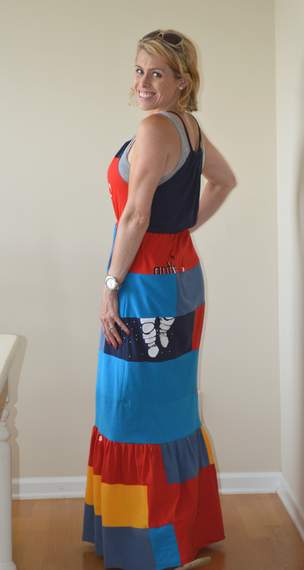
And this jersey maxi dress is super comfy to boot!

So I am totally seeing this for school spirit shirts, camp tees, sorority tees, etc.! What am I forgetting?! Do tell, wheeee!


If you think this is a neat-o idea, please share it! There are twitter, facebook, and pinterest buttons below… Or you can copy the url and paste it straight onto facebook. Thanks for sharing the love! 🙂


Pingback: Sis’s Upcycled “T-Shirt Quilt” Twirly Dress {tutorial} | CampClem·
Very clever
LikeLike
Pingback: Another Neighborhood Crafty Party {and a disaster averted} | CampClem·
Great bloog you have here
LikeLike