
*Updated 2/3/26
Yippee, Valentine’s is coming! So I whipped up this little tote for one of my sweet little nieces.

Believe it or not, a lined tote is supah-dupah easy to make. Come make one with me!

They aren’t necessary, but if you have a few simple tools, the cuts go a lot faster and smoother. Here are links to the exact ones I’ve used for years: rotary cutter, quilt ruler, and cutting mat (as an Amazon associate I earn from qualifying purchases).

You will need to cut four pieces of fabric: one bag body, one bag liner, and two handles. The body and liner pieces are each 9″ x 14″. The handle pieces are each 4″ x 13″. [I trim the straps in a later step, but I like to have the flexibility the extra fabric length gives me. After all, it’s a lot easier to trim than to lengthen fabric.]

Fold the body and lining pieces in half, right sides together. Fold the handles in towards the center and then in half with the right sides out (more detail in next picture below).

If you want to make the handles a bit stiffer, you can tuck in a strip of fusible interfacing (but that is not necessary). Sew along the long open edge of each strap. Set the straps aside for now to work on the bag’s body and lining.

Sew a straight seam along each side of your body piece (leaving top open and bottom folded). Repeat for liner piece.

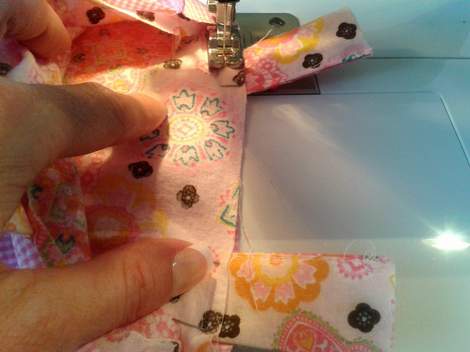
Then, fold the side seam of the body in toward the bottom fold, lining up the side seam and the fold.

Then sew straight across the corner, perpendicular to the seam & bottom fold. Trim off the excess corner fabric. Then repeat the fold, sew, and trim for the other corner of the body piece and for both corners of the liner piece.

Then turn your body piece right-side-out, and you will have gusseted corners.

You will also have gusseted corners on the liner piece, but leave it inside-out.
Decide where and at what length you would like to have your straps/handles.

Then pin the straps in place, right sides together (so basically pin the straps upside-down to the outside top of the bag).

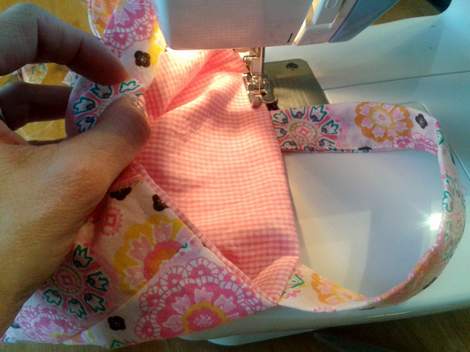
Next, tuck the right-side-out body piece (with straps still pinned on) inside the inside-out liner piece (is that confusing enough??). So now your pieces are right sides together with the straps hidden between the two layers. Line up the side seams and openings of the body and liner pieces.
Then sew almost all the way around the top, starting at the beginning of one strap and going all the way around to the end of the last strap, leaving the space open between where the fourth straps ends and the first one begins.

So it will look like this. Then, trim off the extra handle length and remove the pins.

Next turn the bag right-side-out through the open seam.
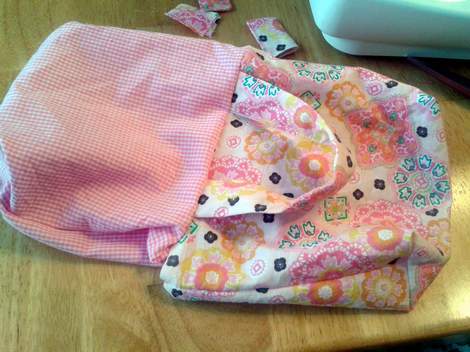
It will look a bit like a mirrored image…

But tuck the lining inside the bag, and things will start to shape up!
Finally, fold the open seam in, and sew it closed, continuing on all the way around the bag opening as a nice finish detail.
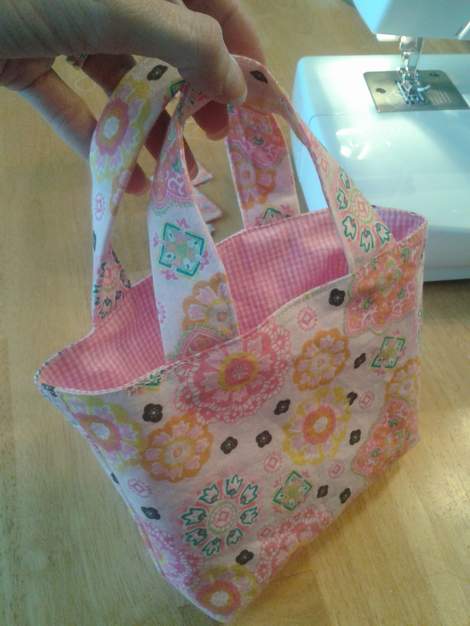
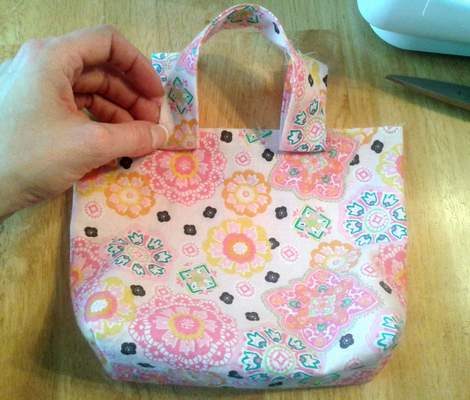
And shazaam, you have a tote!

Sissy was happy to give it a test run for me. So I thought it would be sweet to have her kind of gaze down adoringly at the slightly open tote, showing the size and lining and cuteness of it all in one fell swoop…

*sigh* This is what I got… Soooo…
So much for my career in art direction. I guess I had better stick to crafting and sewing.
Ahem, but I digress.

Since this is a gift for one of my adorbs-able little nieces, I wanted to add a custom bit of love. So in Word, I inserted a “down ribbon” (>insert >shape >down ribbon).

Then I tapped out a little message in two fun fonts: “Pea Sugar Noodles” and “Pea Lovey Dovey.” You can download super cute free fronts from Fonts For Peas. I love that!

Then, print out your label on iron-on heat transfer paper, cut it out, and iron it onto the lining of your tote. Here is the printable iron-on paper I’ve used for years–I just run it through my regular ink-jet printer at home.
And a tip: I always grab the dark transfer paper, even if I’m applying to a white tshirt–it is thicker and doesn’t show the bleed-through fabric behind.

Voila! One cute little personalized tote ready to give! [Oh gracious, I hope she loves it!]
So, anyone else out there handmaking a little Valentine’s goodness? Do tell!


Pingback: A Perfect {post-surgery} Little Girl Gift | CampClem·
Pingback: A Perfect {post-surgery} Little Girl Gift | CampClem·
Pingback: Another Cute Ruffled Tote {the mommy-ready version} | CampClem·
Pingback: January 20, 2014 | PEACE LOVE SARAH·
Pingback: Every Day A Celebration: Patchwork Package | CampClem·
what is the finished size of this bag?
LikeLike
The finished body is about 6-1/2″ tall and 8-1/2″ wide 🙂
LikeLike
Pingback: Creating A Custom Made {and very happy} Camera Bag | CampClem·
Thank you very much for your tuttorial!
I made one for a little princess.
LikeLike
Thankk you very much for your lovely tuttorial!!!
I made one as a gift for a little princess!!!
LikeLike
I love your tutorial thank you so much!!
LikeLike
Thank you for the tutorial. I am going to make one for my granddaughter and grandson but with a small flap on the front and a snap or Velcro to close it. They will be dolly diaper bags filled with a sewed doll bib, a tiny burp cloth, a doll diaper and pretend baby wipes. They have a new brother coming soon and since they got dolls for Christmas I thought what a great time for a doll diaper bag and accessories. My grandson’s will be with jean fabric and my granddaughter’s floral and plaid in vintage fabric. I hope they love this simple bag as much I do. The size is perfect for them.
LikeLike
Pingback: Simple Tote Tutorial & Banner Label DIY – Perfect Girl life style fashion·
This is totally awesome and easy. I made one for my granddaughter out of Sally and Jack Skellington fabric. She totally love them.
LikeLike
Thank you so much. I made one for my granddaughter!
LikeLike
How far in do sew the gussets?
LikeLike
This was super easy. I made one in under an hour for my granddaughter!
LikeLike
I made this bag for a friends 2 yr old she loved it, and it was super easy. Thank you
LikeLike
That makes me so happy! I like to create the iron-on transfer custom label when I make these as gifts too! That post is here somewhere!
LikeLike
Thank you for the tutorial. I made a cute Bluey tote for my grandson. Maybe he will put his little cars in it.
LikeLike