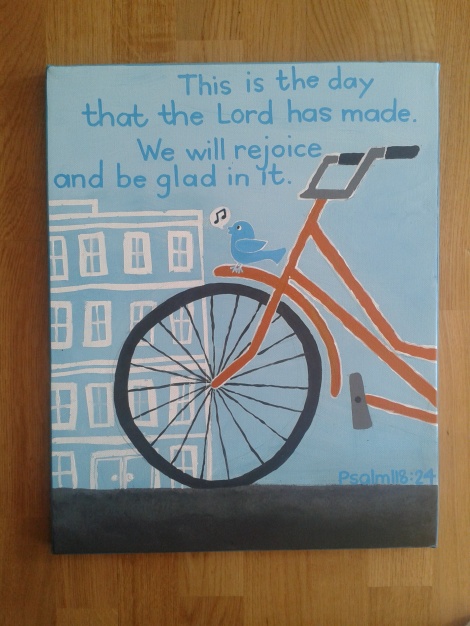
Artwork is pricey… and what you can afford can be impersonal… so why not be your home’s own artist?
First, find your inspiration… I wanted something with a bike, so I googled “bicycle” images and found this fun poster image:

You will need a canvas, a wide paint brush (for the background), a small paintbrush (for the details), and acrylic paints (you can get little pots of acrylic paints for about $1 each–I used blue, orange, black, and white for this project).
Next, I pulled out a 16″ x 20″ canvas and sketched out the bike with pencil–basically a circle and a few lines.
I decided to do the background building using blue tape. Just painting the lines would have been quicker, but I liked the perfect imperfection of the tape lines. I did it by running my scissors around the blue tape to score it and make skinny blue tape strips.
Next, I painted over the blue tape building with white paint–that way, if any paint leaked under the blue tape, it would be the building color, not the sky color. This step also seals down the blue tape so the next layer of paint doesn’t leak under your tape; I made sure to smooth down the tape where it rippled while the white paint was still wet.
Once the white paint was completely dry (and I hit it with my blow dryer because I’m impatient and also because I wanted to get this done before naptime was over!), I covered almost the entire canvas in my background color (I didn’t paint all the way to the bottom, because that will be “gravel” later). I blended the blue paint with white to lighten the shade and made it slightly darker at the bottom than the top. Whatever you choose for your subject, remember to paint what’s in the background first, then layer your way forward.
Once the blue paint had a little time to set up (by not fully dry), I peeled the blue tape. {At this point, I also RE-sketched my bike, which I had painted over in the last step.}
Then I start painting in my bike details. All you need is a semi-steady hand. Then I painted the bottom strip of black-grey “sidewalk.” I set up my laptop with the inspiration image next to my canvas so I could see where I was going as I worked.
And before you know it, you’re here!
I like to have God’s truth all over the place (it’s so encouraging, don’t you think?), so I added a verse using an acrylic paint pen.
Since this doesn’t have a frame, I painted the edges blue to finish the look.
The toughest thing for me is to stop fussing and call it DONE! So propped it in several places all over the house, cocked my head to the side to look at it, then decided to add a little birdie before calling it done.
{And if you happen to like THIS particular painting, you can enter to win a signed, numbered print of it by leaving a comment on this post over here.}
There! Yippee!! Now what are YOU going to create?


I love it. I am pinning as a possible craft group project 🙂
LikeLike
So sweet…JOYFUL! Thanks for posting! :~)
LikeLike
Gina ! You are so creative ! I love to see all the neat crafts you make! Your posts keep me smiling! Thank-you! Sharon
LikeLike
Wonderful!
LikeLike
I love it! I want one even if I don’t win one!! And one of Big Bro’s art of the knight too!! Are you setting up an Etsy shop to sell your wares? You rock!
LikeLike
Merit, you know how to pay a compliment through a question, wow! Thank you! I am looking into an etsy shop… I’ll keep you posted. 🙂
LikeLike
Pingback: Easy DIY Swirly Landscape Painting « CampClem·