
Well, if you live where I live, home decorating is not a one-off deal where some designer comes in and makes everything all perfect. Around here, it’s a process.

Remember when we painted the china cabinet blue? That was last June…

And at that time, I edited the “after” photo to think about what else I wanted to do to finish the room… One of which was to add curtains!

So meanwhile…fast forward nine months… I grabbed a curtain rod that we’ve had around for years, hanging hardware I’d gotten a few months ago (planning to use this rod), and… a tablecloth (stay with me!).
Buying a thick tablecloth is a great way to get a whole lot of fabric for just a little money. This one’s 120″ long. I made it into two belt loop curtain panels (I love belt loop tops because they pleat so nicely, and you don’t need any extra hardware like hanging clips. Here’s how you can make your own pair of belt loop curtain panels using a tablecloth, too!
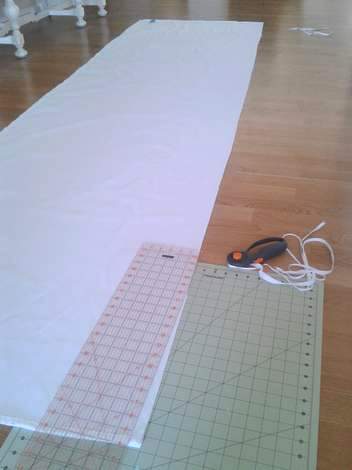
First, fold the tablecloth in half and cut it right up the folded edge. Voila, two panels!

Next, finger fold (or pin) and sew the raw edge hems.

To mark the belt loop openings, measure the top of each panel and divide the total width by the number of belt loops you want (about 5-6″ apart makes a lovely pleat between each when the curtains are hung and open), and mark where the belt loop openings will be. Mine were about 5.5″ apart and 1.5″ wide (so I made two marks 1.5″ apart every 5.5″).

Add where you want the belt loop openings to end (make sure you are marking for a big enough opening to fit your curtain rod. [My openings are marked at about 1.5″ each because I have a very skinny curtain rod.]

Next, sew buttonholes at each of your marks. [I was intimidated by buttonholes for years, but literally, they are just a matter of making a rectangle of zig-zag stitches, couldn’t be simpler! You can dooo eeeeet!]

Make a slit in each of the buttonholes to open (making sure not to cut your stitches). Next, fold the top of each panel over a few inches, and sew down the seam to form a closed tube (except where the buttonholes are). [The buttonhole openings will be in the back of the panels.]

Thread the curtain rod through the panels weaving in and out of the buttonhole belt loops.

And hang those bad boys up! Remember to hang your rod wider and higher than your window to make it instantly look much bigger.
Now, you might be wondering about the bottom hems. They are hemmed, but I’m not much on puddling curtains. The reason I hang them before they are hemmed to the right length is because this is the easiest way to get a perfect-length hem: hang them first, then pin them while they are hanging. You will have the perfect length! Take them down, hem them up, rehang ’em, and call it a day!
Of course, the littles’ naps ended before mama got it done… so we’ll get those done tomorrow (I promise not to wait another nine months!!). I’m just so happy to have some curtains hanging up in this room and how big they make the dining room windows look! Wheeeee!
The dining room is getting there! We’ve got color and texture in the space… Now we really need some pattern going on, hmm…
So, anyone else out there ever make window coverings out of something other than just plain fabric? Do tell!


I made some short curtains out of a table cloth. I have also used flat sheets to make curtains.(you don’t have to hem them because they already are hemmed.) I really like the look of your long curtains!
LikeLike
Pingback: How To Make {very light} Curtains Into Black Out Panels | CampClem·
Pingback: A DIYer’s Home: Art Tour | CampClem·
Pingback: 6 Ways To Repurpose Your Linens After The Wedding | LinenTablecloth·