
When my friend Deborah posted pics of her little boy’s adorable Mario Cart, I knew I had to share!

Here’s the creative process in her own words:
First [hubs Kevin] just kinda drew the profile of the car on red foam core board. (No box was ever used) These were the sides of the car. Next he stabilized the two pieces of foam board with 12″ Dowel rods (longer if your kid was bigger probably).

He attached the rods to the foam board with screws and washers. Be sure to pre-drill the ends of the dowels so they don’t split out. He also used gorilla glue on the screws to help them hold a little better. (He cut one dowel a little shorter and put the screw through both the sidewall and the support for the spoiler which was cut out of foam core board. Just angle off the top of the supports so the spoiler sits right on top of them.)
Next he cut a piece of foam core board for a dashboard and kind of a back to the part where Brock stands. If you make them just the right size you can put some glue on them and wedge them in.

Next he covered the front and back in black poster board. It was attached with red duct tape along the whole edge. He went on to cover all the edges of the foam core board in red or black duct tape so that the foam wasn’t exposed anywhere.
Then he put the stripe on it. It is just a strip of red duct tape with a half-strip (split in half lengthways) of some really shiny silver duct tape he found. Put the stripe on the front and the back.

Next he attached the spoiler (just a rectangular piece of foam core board) to the supports with hot glue. Out of those flexible foam sheets, he cut out wings, the M circle on the sides, and the grill. He added the silver duct tape to the grill for the stripes. They were all glued on with hot glue. If you put the hot glue on the car first it won’t melt the foam too much.
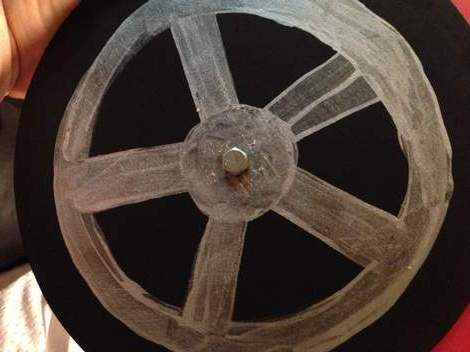
The wheels are just thin wooden circles painted to look like wheels. They are attached with a bolt, washers, and a nut.

The steering wheel is a styrofoam disk that he cut out to look like a steering wheel. It was then covered in black duct tape. He attached it to the dash with a bolt, washers, and nut so it spins.

attaching wheels to frame with bolt, washer, and nut

elastic attached to dowel rods provide suspender-style straps to “wear” car
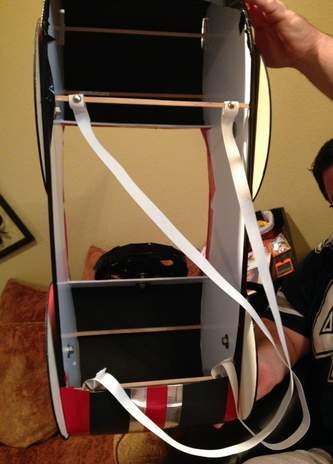
the underbelly view

Gah! I love!! They even nailed the mustache!! Talk about kicking a store bought costume up a few notches! Way to go Kevin & Deborah! Thanks for letting me share!
This Wild Wing Mario car totally reminds me of the year that I turned our double stroller into a squad car for our little police officer thanks to some foam core and cable ties, huzzah!
For Halloween, we are going to a massive carnival at our church that spans four soccer fields with inflatables, carnival games, fair food, and lots of fun! Oh, and candy… of course! [It’s free, too! I’d love for you to join us!] So, what are y’all doing/dressing as for Halloween?
*
You might also like…


