
Ever since I got a cute ruffled hem dress for my birthday (wheee!), I’ve been thinking of making something with jersey fabric.

It’s just so soft and relaxing and lovely. And ruffles? C’mon, you had me at hello.

So I grabbed an old shirt and set to work! [This was a DIY iron-on shirt I made a few years ago.] Here’s how you make that old shirt into a little girl’s pair of ruffle pants!

First, cut off the sleeves and straight across under the neck. Also, cut off the bottom several inches of the shirt–this piece will become your leg opening ruffles in a later step. Leave the body of what is left long enough to reach from your daughter’s waist to just under her knees plus an inch or two of seam allowance. [This does not have to be exact–you will either have a shorter pant and taller ruffle or longer pant and shorter ruffle.]

Next, fold the front and the back pieces of the shirt in half down the middle, then make a straight then curved cut up one side for the leg opening and waist. You can use an existing pair of pants folded in half to estimate the cuts for the pants sizing. [Click here for a full tute on how to make a pair of ruffle pants, if you want more.]

Separate the front shirt piece from the back shirt piece. Fold each piece in half, right sides in, and sew up the straight edge. [This will be the pants leg.]

Next, turn one of the pants legs right-side-out and tuck it into the other one so the two pieces line up.

Sew around the “u” of the curve to join the crotch pieces together. [Um, it feels really wrong to say “crotch”–is there some other more appropriate sewing term for this??]

Fold under the top of the pants about 3/4″ (no need to turn under twice because jersey doesn’t fray). Add an elastic waistband. [I only added about 6″ of elastic across the back–you can see the vertical white stitches where its ends are secured. Since the jersey is already stretchy and I cut these close, there was no need for elastic all the way around.]

Set the pants aside and grab the scrap bottom piece of the shirt. Cut it in half and then fold over (right sides together) and sew each piece closed along the side.

Finally, with the pants the right-side-out, slip one of these pieces over each leg opening (still wrong-side-out), so that the pants and this soon-to-be-ruffle are right-sides-together. Line up the unfinished opening. Then sew all the way around the opening, starting and finishing at the inside leg seam, scrunching the bigger piece of fabric a little as you go to make it the same size as the leg opening. (or ruffle the fabric before you attach it). Repeat for other leg.

Flip down the ruffle, slip on the pants, and she’s off!

[Here she is helping Big Bro make smoothies.] She completely loves these, wore them the rest of the day and asked to wear them again the next day. Now THAT’s comfy!

And this is such a fantastic way to preserve a favorite old shirt. I’m sorely tempted to take the scissors to my FDNY shirt… Hmm… Maybe a little VBS tee upgrade for next year…
So, what shirt will your little girl get? An old rocker tee? Camp shirt? Wheeeee!
*
Here’s some other shirt fun…

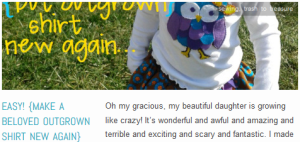


Wow! Super cute. They do NOT look like an up-cycled tshirt! This makes me want to learn how to sew!!
LikeLike
Pingback: DIY: Panda T-Shirt | Dibbler Dabbler·
Pingback: 8 Ways to Upcycle T-shirts | Sewing | CraftGossip.com·
Pingback: VBS T-Shirt Refashion Time! {sew AND no-sew possibilities} | CampClem·
Pingback: New Doll Clothes From An Old, Worn {treasured} Outfit | CampClem·
Thank you for all of your tutorials! I know I’m a few years late but I have been a sewing maniac since I’ve found your blog 🙂 I love using up-cycling things! Thanks again!
LikeLike