
When I was wandering around a local place called Regeneration Station, and I saw this little big beauty bunged off to the side away from the other sometimes-overpriced merchandise, I gasped and swooned just a little bit. When I climbed over a few things for closer inspection, I saw that this light was marked only $15. I just about fell out.
But alas, I did not have $1 to spend on a project that would probably end up just taking up valuable garage space until my husband finally convinced me to get rid of my little treasure…

I knew it would look just brilliant in the eat-in kitchen.
I couldn’t get it our of my mind… So when a girlfriend said she and her hubs had snagged this after I passed and shared the find, I felt happy for them… and excited that this light fixture would gain its due appreciation… But a little sad too at the loss…
But y’all–Y’ALL!–she ended up not using it and GAVE IT TO ME.
Just y’all. I just. I can’t.

Okay, I’ll admit that if you are not really into the slightly worn look, this light will do nothing at all for you…
In fact, our family sort of looked at me like I had finally gone off the deep end, and they are usually quite supportive of my crafty DIY endeavors.
But apart from loving it at first sight, the warehouse employee told me that they’d had dozens of these and that they came out of a 100-year-old local school gym that had been torn down. *GUSH*

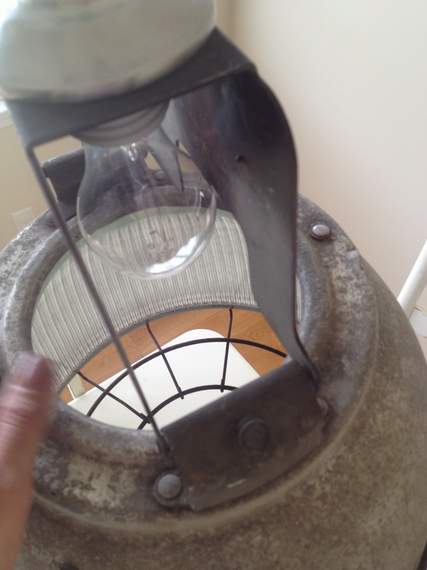
A peek inside reveals more of its glory. The glass is in perfect condition.

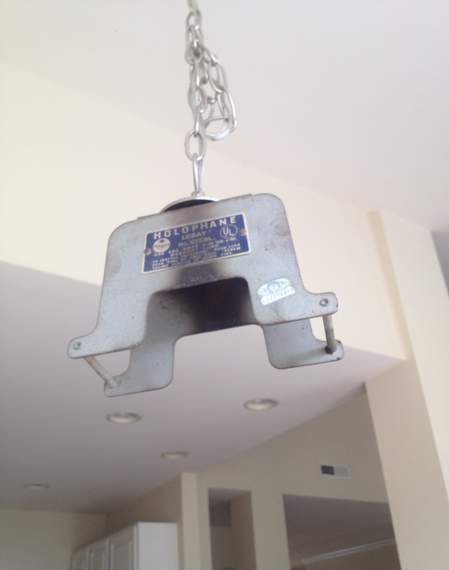
It’s pretty unusual, I think, to find these fixtures with the bracket and guts still attached, but this one seemed to have everything. I freed the guts from the bracket (thanks to a neighbor, actually, who had the right tools to do it when my sheer brawn–haha–didn’t win out). When I researched the name on the bracket, Holophane, I found out they are a light company, still around today, who pioneered this reflective glass technology. And–OH!–how I longed to see this all lit up.

I had this epiphany the other day, back when I was taking the glass light fixture down to dream about its replacement, I simply unscrewed a threaded o-ring that held the glass dome in place.

So, I took the glass dome down and put the bracket up.
I was ready to hang the light!
But alas, this behemoth is 19 pounds heavy… And since I didn’t know what sort of hook up I had in the ceiling, I didn’t want to risk bringing down the whole thing with a too-heavy fixture.
[There are typically three ways of installing electrical boxes in your ceiling: 1) just inside the drywall, just fine for a light weight light, 2) nailed to a stud, which can certainly hold more weight, but I wouldn’t go above 20 pounds, and 3) braced between two studs with a metal bracket. This is the sort of securing you would see for a chandelier and can hold 50 pounds…]
BUT, always ready to solve a problem, and still not knowing the electrical box’s weight allowance, I figured we could still hang the light by swagging it, using a hook that could handle the weight and screw into a stud. This could be ideal since there is more chain length on the fixture than we need, and our table is now off-centered a smidge since we moved from a four- to six-top, so we could center the light back over the table.
Okay, so that problem solved (at least in my head), I just HAD to see this lit up, so I bore the weight and hung it. But when I screwed in the light bulb, I noticed another problem. Alas. The bulb is a few inches above where it needs to be…
But a quick google search for “socket extender” (I didn’t really know there was such a thing, but wondered, so why not?) and found one for under $5 with free shipping!

But meanwhile, rather than just waiting on a package to arrive, I turned my attentions to getting the light cleaned up. I planned to spraypaint it, so I unscrewed the bottom grid and carefully covered the top opening (to protect the glass).

I got everything set up outside and went to work with my sanding block to see if I could clean off some of the schmutz before painting.
AND YOU KNOW WHAT HAPPENED??

This.
See there on the right side? It started shining right up, a 100 years of schmutz gone with just a bit of elbow grease!

*SCHING!*
I could not believe the difference between before…
…And after:

Wow.

The grid was a different story, though. The brown rust was going nowhere despite my best sanding efforts…

So it got a quick coat of metallic spray paint, and we were off to the races!

I cannot tell you how happy this light makes me.
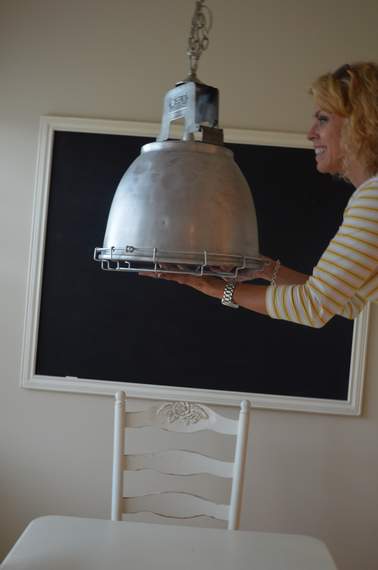
Here’s what it will look like once all the details are ironed out. Just lovely with my painted furniture and DIY chalkboard, non?! Wheeeeee!


Fabulous light! And I, too, like its history of lighting up a gymnasium. GMWells
LikeLike
Very very cool story. And great repurpose! I restore vintage industrial lighting.. porcelain enamel, industrial holophane, explosion proof, antique street lights, and vintage movie stage lighting.
I know you finished this a while back… but my advice? Lose the aluminum skin. most restorers remove that- you will then get the full effect of that beautiful holophane prismatic glass!
Good job!
ps, the rarest part of your light, funny enough, is the cage. mucho cool, that.
LikeLike