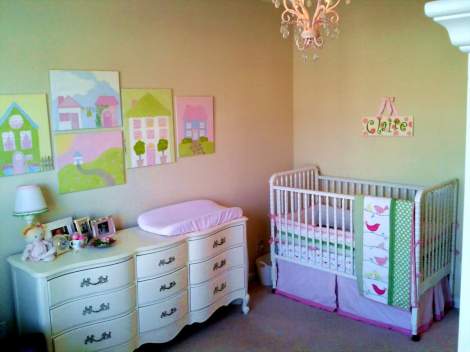
I have to chuckle when people say they say they decorated on a “shoestring budget” of, say, $2000… THAT’s your shoestring? Nice. Can I walk a mile in those shoestrung shoes? Meanwhile, at CampClem, we are abundantly blessed, but our shoestring budgets are a liiiiiiiiiittle bit thinner. So I wondered how much we might have actually spent to pull-off our daughter’s nursery… I am pretty humbled as I totted it up that there are so many items that were gifted to us–most of her bedding, a chandelier, a personalized bow holder, the chair, her curtains… And some things we already had, like the crib, the TV-armoire-turned-closet, the little wicker rocker… BUT there are a few items that are worth a thrifty nod, and I thought I’d take a moment to {hopefully} inspire you to fill in some decorating gaps in your home with very little or no money. So here we go–wheeee!
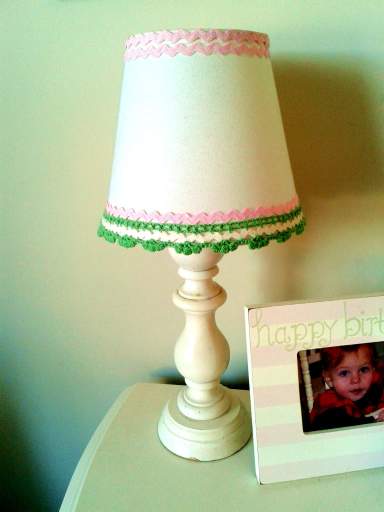
The lamp came from Goodwill for a whopping $3. Both the base and cord looked in good condition, so I went for it. [Incidentally, did you know that Goodwill has a return policy on electronics? So it’s no risk: if the item does not work, return it. Check with your local thrift store to see if the same holds true for you.] We already had the shade from an old, unused lamp, and I dressed it up a bit with some crochet trim & ric-rac I had.
Total investment for lamp base, shade, & trim: $3
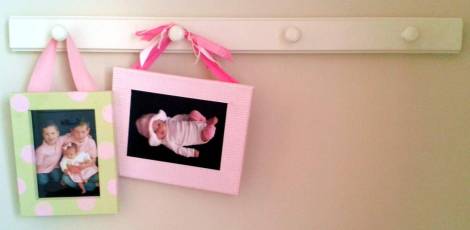
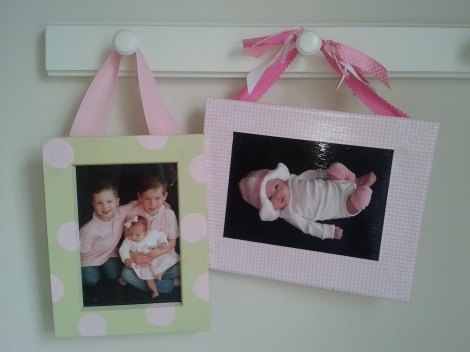
This peg rack is great for me because I just love to change things up & it allows me to do so without any nail hole commitment. The price was even better: marked down to about $10. The two pictures hanging on there now are an old frame that I painted and polka-dotted with craft paint and an old canvas over which I modpodged some pink gingham scrapbook paper. Then I staple-gunned some ribbon on the backs to make hangers. The two photos were shot in our “home studio” (which I blogged about yesterday here if you want to see how to snap some free “professional” pics of your kids, too). The left one was simply inserted into the frame and the second was modpodged straight onto the scrapbook-papered canvas.
Total investment for peg rack & two hanging pictures: about $12
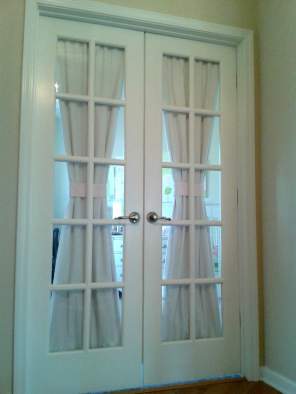
Our daughter’s bedroom is not actually a bedroom at all, but technically a bonus room. We used to use it as an office & play room, but when it became hers, the glass-paned double doors leading into it needed to be dressed. My sweet, generous sister-in-law had gifted us curtain panels from PB Outlet for the window, so I bought a third matching one ($25) and cut it in half and “black-out” lined it with some heavy, opaque upholstery fabric I got in the bargain bin at the fabric store for about $4. The tie-backs are two halves of what used to be the top of the curtain panel, so each tie back literally has a hidden beltloop (curtain rod loop) through which to thread one end and form the tie-back. I hung them using very inexpensive rods at the top and bottom. Here’s the view from outside (left) and inside (right).
Total investment for french door panels & hardware: about $32
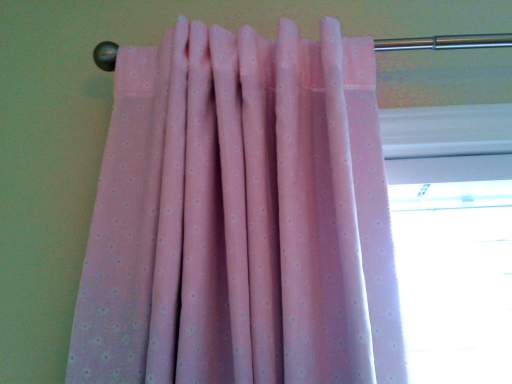
Somehow the stars aligned on this next buy: When I was at that PB Outlet getting the extra curtain panel, I spotted this fantastic curtain rod with finials and hardware in the clearance area. It was 90% off it’s already reduced price of $17. I couldn’t figure out why it was so cheap, but figured at $1.70, it was worth finding out (I’m still not sure why). Like I said, my sister-in-law had given us the two curtain panels, and I simply sewed my bargain bin “black-out” fabric between the curtain and white liner layers a la sandwich style.
Total investment for 108″ [black-out lined] curtains, rod, & finials: about $14
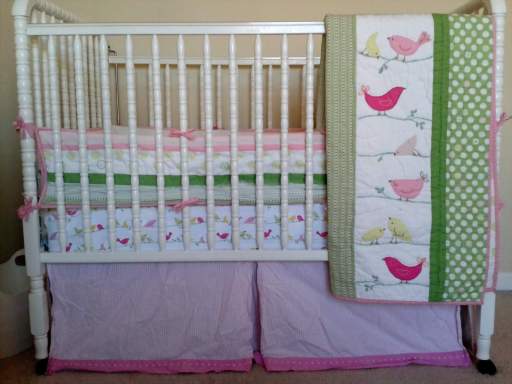
To fill in the bedding, I found a coordinating crib skirt on clearance at a Pottery Barn–it wasn’t our specific pattern, but it matched fine, so we went with it (um, and yes, I know it could do with a good ironing–can’t we just call it shabby chic? I’m looking for a friend here). And [at Pottery Barn Outlet AGAIN], I found two euro shams, one that was our pattern, and one that matched it & the curtains, for $3 each. Sometimes I hang one of the shams quilt-style on the peg rack by safety pinning two loops of ribbon onto the back for hangers. It’s great to rethink items and use them in different ways, non?
Total cost for crib skirt & shams: about $35
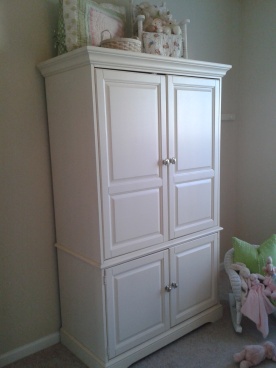
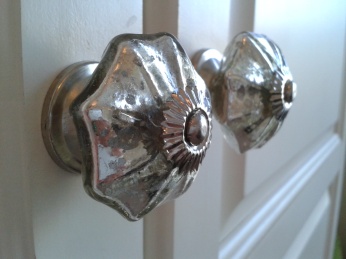
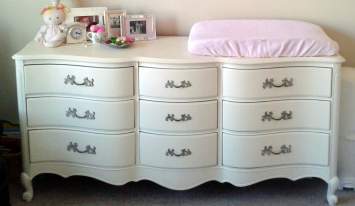
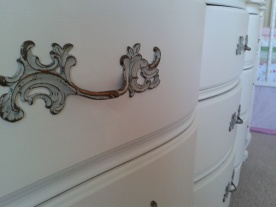
Now since this bedroom is not ACTUALLY a bedroom, storage could be a real issue. Thankfully, we have an old TV armoire that–thanks to a tension rod–became a closet. I just girlied it up with a set of mercury glass knobs I got at HomeGoods for $7. And I searched thrift stores and CraigsList to finally hit the jackpot with this storage mecca of a dresser. It is the EXACT style I was hoping for, all girly and feminine, and although I was originally looking for an uber-cheap deal I could paint myself, I traded the cost of paint and we coughed up $125 for this little pretty. WAY more than we’d ever usually pay, but well worth it to get exactly what I wanted already painted the color I was going to paint it!
Total investment for closet & dresser: $142
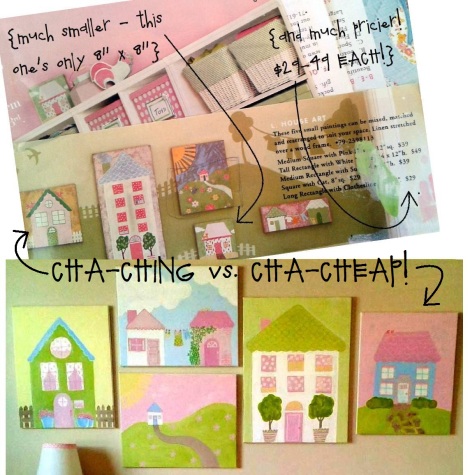
For artwork, I loved these Pottery Barn prints (below), but they were both small and pricey! I bought one 18″ x 24″ canvas and a five-pack (I used four) of 16″ x 20″ canvases (with Michael’s coupons, of course), and I made my own version of the little houses art. If you can draw a square and a triangle, you can pretty much pull this off. I already had the paints, so my version was a LOT more affordable than the PB ones, which cost between $29-$49 EACH.
Total investment for artwork: about $16
Here’s what STILL on my knock list:
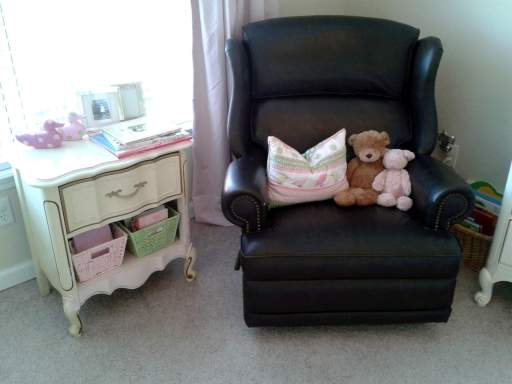
The chair. It’s comfy & wonderful & faithful, a gift friends gave us MANY years ago. We love it. It even rocks or reclines! But the dark brown leather worked much better for a boy’s blue & brown baseball themed room than for a girl’s pink and green girlie-girl room… Methinks a slipcover is in its future. I mean, how hard could it be to sew a custom slipcover, right? Get tangled up, just tango on; that’s my motto.
And the bedside table (which is a chair-side table for now). It is still in vintage paint with a few patches of pink where I thought about painting it with my free pint of Glidden ballet pink paint. I really just need to choose a color and git ‘er done. Thankfully, one-year-olds don’t tend to complain about such trifles.
Of course, there are a few wonderful sentimental bits and pieces, too: her chandelier, her dresser “vignette,” and a personalized bow holder, among other things….
{click thumbnails to enlarge}
So there you have it, a little peek into my cheap… or, er, I mean CREATIVE solutions for some potentially expensive home decor challenges! Wheeeeeee! Now what room are you looking at, thinking it could use a little shoestring renovation?


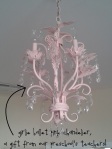

My favorite thing in the room is the chandelier. What store did that come from? May we see a better picture?
LikeLike
I’ve added a few thumbnails close to the end of the post you can click on to enlarge. The first one is the chandelier. It came from a local baby boutique here in Asheville, North Carolina, called Posh Petite. I’m sure the owner, Melody, would ship anywhere!
LikeLike
you are SO my kind of gal – I’m the same about thrifting for a find, and then “fixing it up”! I did our upstairs “retro room” in much the same way.
You baby girl has such a lovely lovely room – may God continue to bless your FAMILY INDEED!
Go Gina 😀
LikeLike
Wonderful room for a beautiful little girl!
LikeLike
I’m so glad I found this post! Baby #5 will be making his debut soon, and it is creating some serious design challenges at our small house:) I’m definitely going to be searching out some thrifty finds!
LikeLike
Pingback: Scoring and Refinishing a CraigsList Furniture Deal {How-To} « CampClem·
Pingback: Quick, Easy, Custom Color Chalkboard Alphabet Blocks « CampClem·
Pingback: Before & After: Goodwill Bedside Table Goes Powder Pink | CampClem·
Pingback: Organizing The Crafty Mayhem | CampClem·
Pingback: A DIYer’s Home: Big Ol’ PBK-Style Baseball Art | CampClem·
wow I’m in awe with your entire blog. I’ve been scouring over your posts. I love your canvas artwork!!! How adorable everything is and how you did this room on an amazing budget is awesome!!! So happy I found your blog.
LikeLike
Justine,
Thank you for your kind words! They bless me!! I’m so glad you stumbled onto CampClem! Please come back often!
g i n a
LikeLike
Pingback: A Little Picture Frame DIY For Sissy’s Room | CampClem·
Pingback: Quick & Easy Lamp Shade Makeover {for li’l bro} | CampClem·
Pingback: Updating Sissy’s Paintings {with scrapbook paper & fabric} | CampClem·
Pingback: How To Make {very light} Curtains Into Black Out Panels | CampClem·
Pingback: A DIYer’s Home: Art Tour | CampClem·
Pingback: Snail Mail Happiness: Oversized Labels & Colorful Envelopes | CampClem·
Pingback: The Big Furniture Paint-A-Thon Of 2013 | CampClem·
Pingback: DIYer’s Home Tour: Little Girl’s Bedroom | CampClem·
Pingback: Super Simple & Free No-Sew DIY Toddler Bed Skirt | CampClem·
Pingback: Sis’s Blank Wall Gains {easy & affordable} Painted Frame Mirror | CampClem·
Pingback: Wedding Wednesday: Tales of a Wedding Planner | Mama Momtourage·