
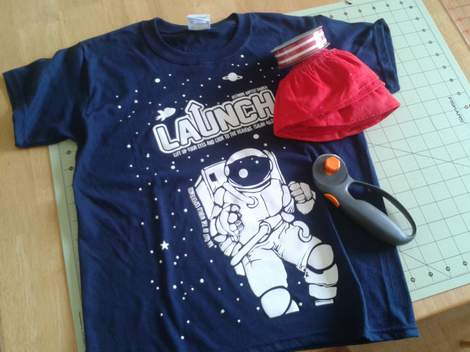
I was looking back at my t-shirt-to-dress post from last June and… well… it stinks! DO OVER! Not only have I simplified and improved the process (thanks in part to my brilliant and crafty friend Jody for her suggestion of an elasticated neck, genius!), but I’ve taken gobs of step-by-step photos to get you from a plain old t-shirt like this…
to something frilly and fabulous like this:
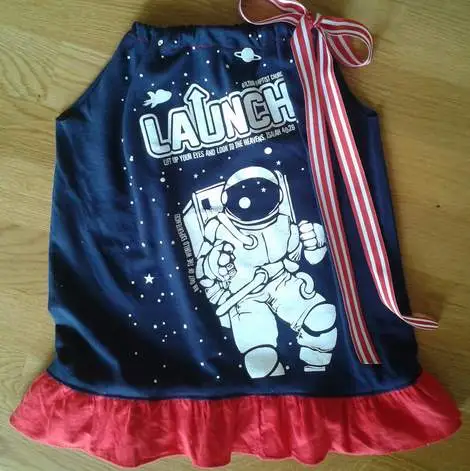
Gah! So cute! Tell me more!
Here’s how you do it…
1. First, grab a shirt that is a couple of sizes too big for your daughter (this is a Gildan youth large for my 2-yr-old). Lay it flat and cut off the sleeves just inside the seam. [I use a rotary cutter & self-healing mat for ease and speed, but scissors are fine, too.]
Tip: jersey doesn’t fray, so you can leave the edges raw! Score.
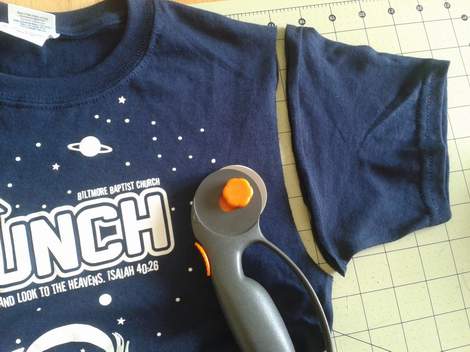
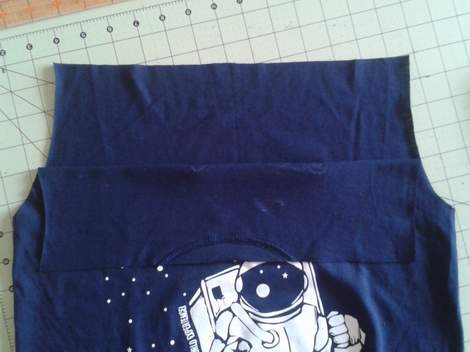
2. Cut off the top of the t-shirt lining up right at the top of the collar (for max length, but if you are not worried about length, you can line up about an inch lower and cut the collar off altogether; wither way, the collar will not show when finished).

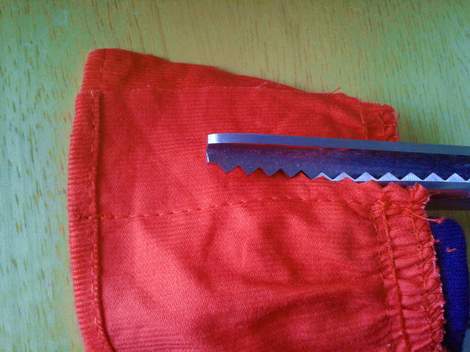
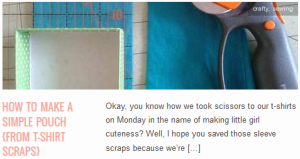
So you now have something like this. Set the sleeves and top aside, you are done with them (unless you are doing a tank for mommy, in which case, hold on to those sleeves for a bit… OR I have a fun & super simple pouch tutorial coming up this week using the sleeves. Don’t miss it!).
[UPDATE: Here’s a super quick and easy pouch tutorial to make with those left-over sleeve scraps!]
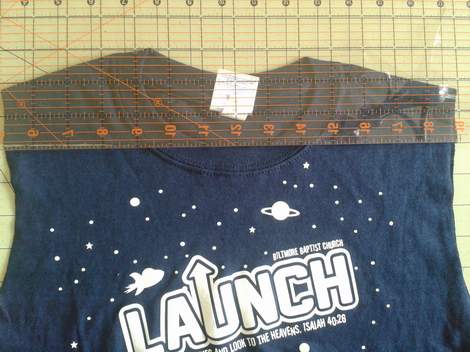
3. Fold the front of the shirt down to revel the back, and fold & pin both sides in about 3/4″.

So your shirt should now look something like this.
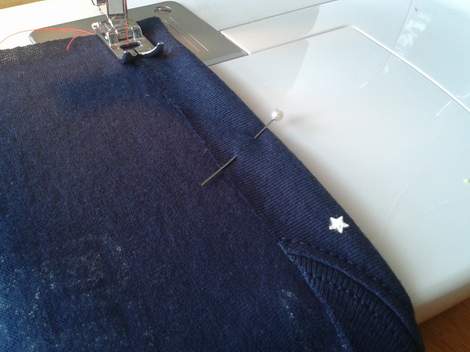
4. Sew each side down to form a tube.
[So here is the back sewn and the front waiting to be sewn.] I love to use contrast thread for this, but using the same color of as the shirt is grand too.
So far, so good! Now you have made a “tube” for your elastic to thread through the front and the back of [what will be] the neck opening.

5. Grab a length of 1/8″ elastic (slightly thicker, like 1/4″, is fine, too) short enough not to fall off your child’s shoulders when looped, but long enough that it will fit over her head when stretched. [Mine is 16″.]
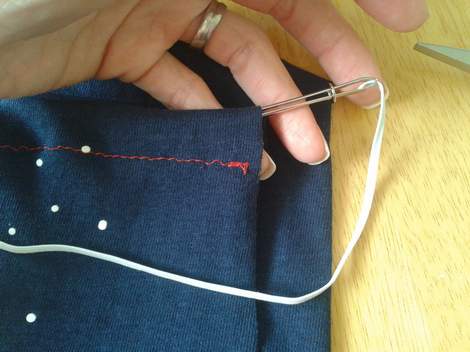
6. Using your bodkin, pull the elastic through the front opening (using a safety pin to pull the elastic through the tube is fine too).
7. Pin the end of the elastic in place before carrying on to the other side, so you don’t pull your elastic straight through and back out.
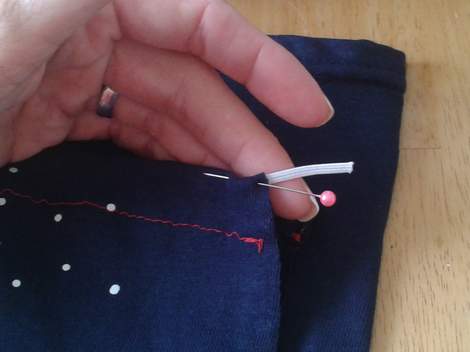
8. Once you’ve pulled the elastic through the front and back through the back, overlap the two ends and sew them together.

9. Then overlap the shirt front and back slightly to cover the elastic, and run a couple of stitches back and forth to secure the shoulder. Repeat for the other shoulder.
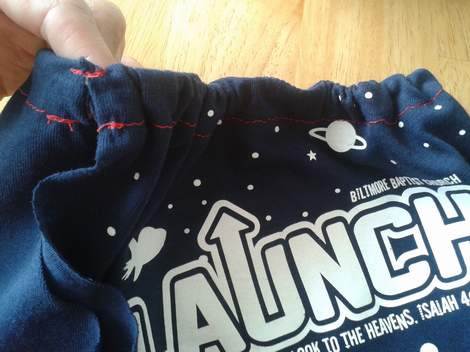
So it will look like this (top left red stitches).
Okay, so here’s what you have so far… Which is a vast improvement over a plain t-shirt… But we can do better!

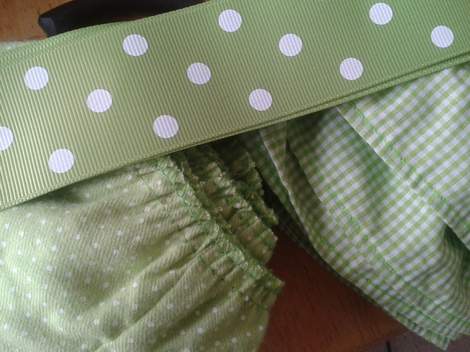
10. Grab a length of ribbon (the wider, the better in my humble southern opinion). [I used 24″ to get a nice big bow and long trains.] And secure its middle to one shoulder with a couple of stitches.
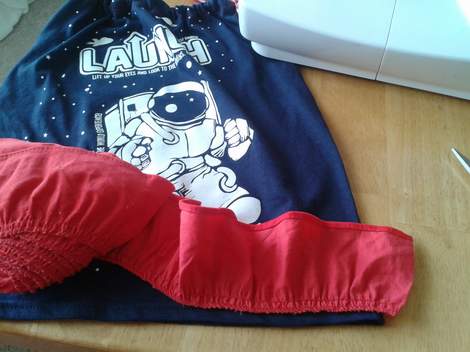
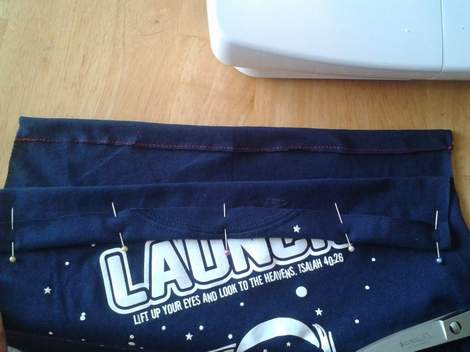
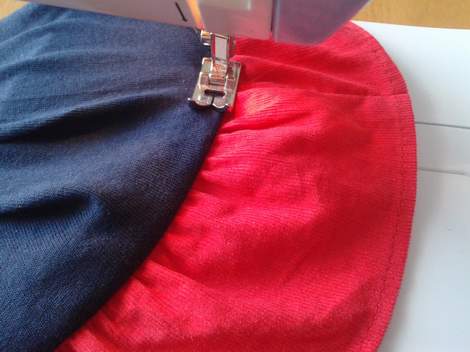
11. Time for ruffles! I prefer to sew with an extra-long piece of ruffled fabric and then trim off the excess rather than do tedious measuring and hope the stretchy jersey cooperates.Flip the ruffled trim up with right sides facing together (so the pretty face of the ruffle is facedown in this picture). Starting at one side seam of the shirt, pin if desired all the way around the bottom of the shirt leaving about an inch overhang at the beginning and end points.
Tip: If you don’t know how to ruffle fabric, you can buy premade ruffled trim at the fabric store, buy a ruffler foot for your sewing machine, OR follow my uber easy & fast tutorial on one of the simplest ways to ruffle fabric—link here).
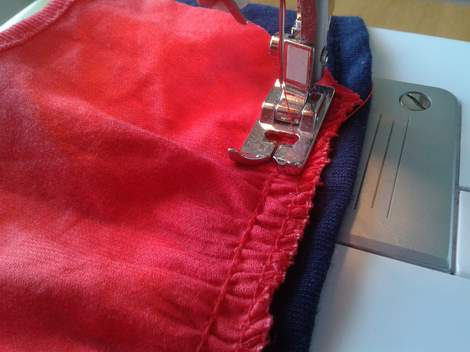
11. Starting about an inch (or more) from the end of your fabric ruffle, sew all the way around the shirt bottom to secure the ruffle to the shirt.
Stop when you get back to your starting point without overlapping.
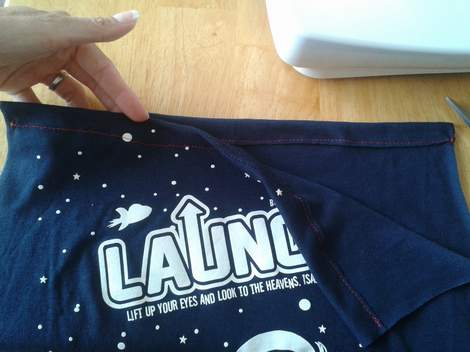
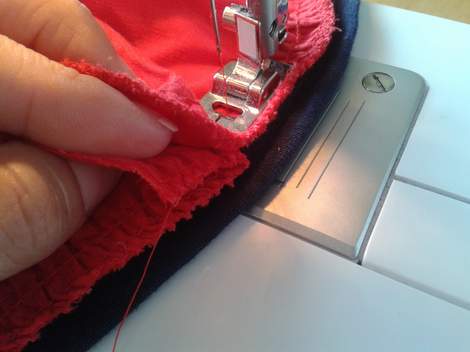
12. Then remover the shirt from your sewing machine and replace it so that the start and end points of the ruffle overlap, right sides together. Then sew straight up from the bottom of the riffled fabric to where the two seams meet on the shirt to close the ruffle loop. [Make sure to keep the shirt out of the way for this step.]
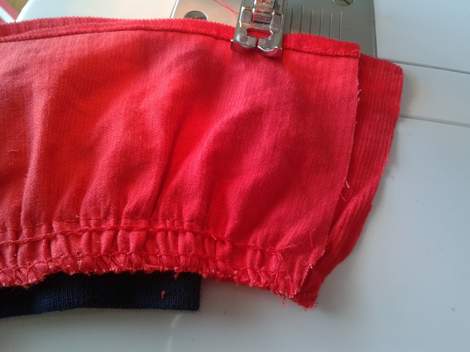
13. Snip off the extra ruffle fabric.
14. Finally, flip the ruffle down, and run a row of stitches all the way around the shirt again, this time about 1/4″ – 1/2″ from the ruffle both as a decorative detail and to keep the ruffle from flipping up.
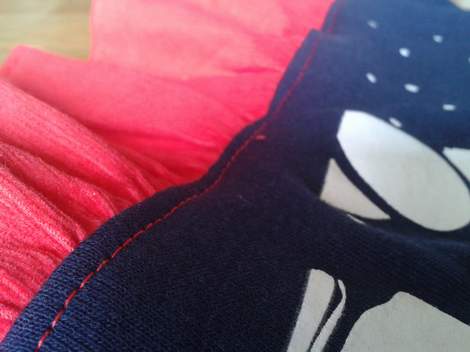
[So it will look like this.]
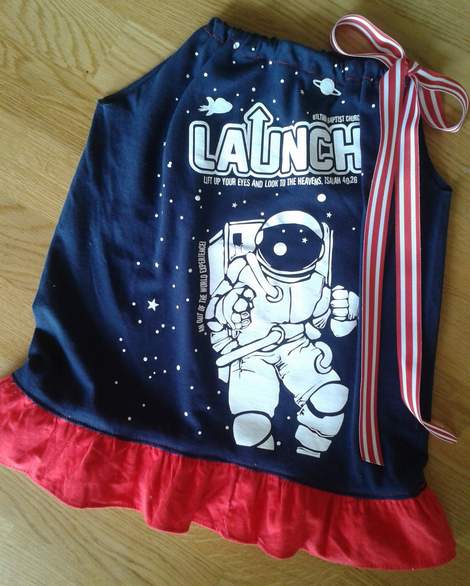
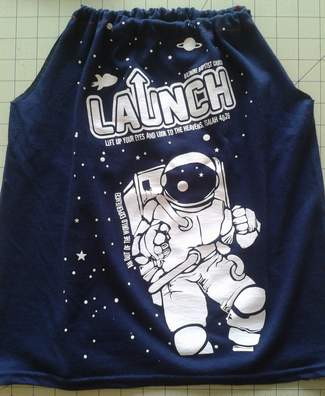
And shazaam! Copious amounts of adorableness!
Of course, with so many stinking cute options available, I had a bunch of girlfriends over and we had ourselves a little shirt-to-dress party!
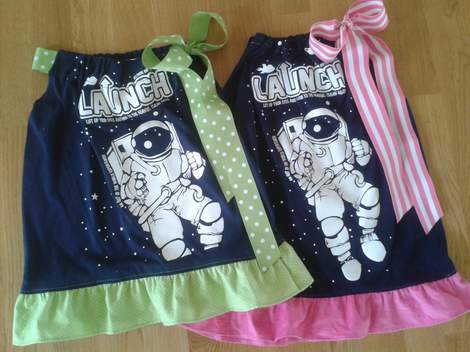
It was fabulous! And the cuteness we were able to create was epic. 🙂
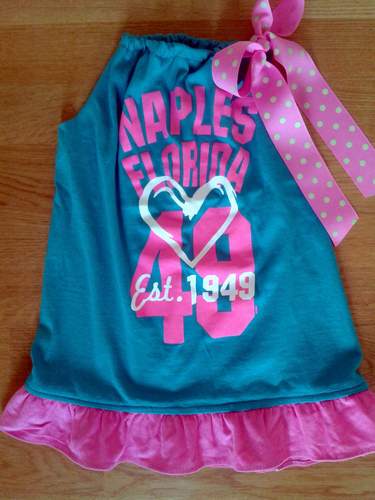
I’ve done several of these shirt-to-dress makeovers over the past year or two. My faves are for vacation destination shirts (think: Disney!), camp shirts, big brothers’ school spirit wear shirts, and church VBS shirts. And I’m thinking of taking scissors to some of my old t-shirts and doing this for a fun vintage upcycled look. WHEEEEEEEE!
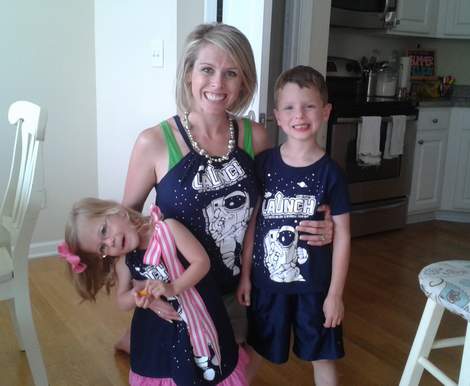
Here’s sis in her newly upgraded shirt-to-dress… Being silly! as usual!
Be sure to post a pic to the CampClem facebook page when you take the scissors to your t-shirts, m’kay! I wanna see!

You might also like…


Pingback: From Child’s T-Shirt To A {stinkin’ cute} Toddler Dress | CampClem·
Pingback: How To Make A Simple Pouch {from t-shirt scraps} | CampClem·
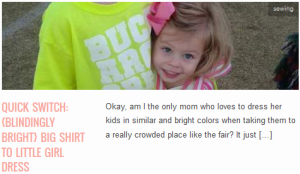
Pingback: Quick Switch: {blindingly bright} Big Shirt to Little Girl Dress | CampClem·
Pingback: Another Cute Ruffled Tote {the mommy-ready version} | CampClem·
THANK YOU!!!! I went through a TON of Google searches and landed on your page. 🙂 Thanks a million for this detailed tutorial!!!!
LikeLike
Splendid! I’m so glad you found us! I hope the tutorial works well for you!
LikeLike
Pingback: T-Shirt To Cinch-Waist Dress {simple sew DIY} | CampClem·
I googled a simple t-shirt to dress tutorial and came across yours. I’m a novice seamstress and this took no time…and actually turned out as it was supposed to! I think my girls might actually wear their (always) over-sized VBS t-shirts happily. Thank you!
LikeLike
That is awesome! I’m so happy you found CampClem and the tute worked out well for you! WHEEEEEEE! {I’d love to see a pic if you want to link here or on the CampClem facebook page! https://www.facebook.com/CampClem }
g i n a
LikeLike
Our church has Service Sunday, and the smallest size t shirt was way too big for our daughter. Now she has a super cute dress to wear instead! Thanks for the super easy instructions! I found them on Pinterest.
LikeLike
Hooray!!! I’d love to see a pic if you would be willing to share on the CampClem facebook page! https://www.facebook.com/CampClem
LikeLike
Pingback: How To Make {little girl} Upcycled T-Shirt Ruffle Pants | CampClem·
This is beautiful!
I was wondering if you could remake a t shirt I bought at my daughter’s school. I had to buy a size L adult shirt because there were no more in her size.
How much would you charge and how soon can you can you do it?
The event us Wednesday and I just found out about it today!! If you can’t, I understand.
LikeLike
Hey Elizabeth! I’m afraid I’m under water until next weekend. Our elementary school’s biggest fundraiser/event of the year is coming up fast, and I’m on the planning team. You really could DIY this, promise!! 🙂
LikeLike
I was just curious what size the shirt to dress is you made for your daughter and what size she actually wears? I bought my daughter a shirt that is one size too big but not sure if I should go back and buy one that is another size bigger.
LikeLike
Good question! She would have gotten an Youth XS, and that would have been loose. I believe this shirt was a Youth Medium. I would definitely recommend getting 2-3 sizes bigger than her regular size. Hope that helps! Have fun, wheee!
LikeLike
Okay, so i did this today! I used a memorial shirt that I want to keep around as long as possible, in remembrance of a young boy who died in a house fire near here. —- I didn’t do the ruffle at the bottom, and the shirt was too big so I cut the sides and made it smaller and sewed them together rightsides out. Then after I finished it, I cut them along the sides and around the bottom so that it would curl up after wear. I added them on FB, I’ll have to like your page and tag you in them. THANKS FOR THE TUTORIAL!!
LikeLike
Pingback: VBS T-Shirt Refashion Time! {sew AND no-sew possibilities} | CampClem·
Pingback: Sis’s Upcycled “T-Shirt Quilt” Twirly Dress {tutorial} | CampClem·
Pingback: Another Neighborhood Crafty Party {and a disaster averted} | CampClem·
Hi, I came across your blog the other day and was gave this thsirt into dress a go…and it came out ok (I have a small electric sewing machine which doesn’t do the job nearly as well.) Your instructions were so clear and I really love your blog so will be leafing through it now to see what other creations I can make!!!
LikeLike
Pingback: The “Learning Superpower” Ruffle Shirt | CampClem·
Pingback: Five Things To Do With Old T-Shirts - Mama Bees Freebies·
I know this is a really old post, but here’s hoping. How would you do this with a shirt that has a logo printed on the left front? Would you worry about the design being distorted? Thank you in advance!
LikeLike